
Back when I used to buy electric guitars instead of building them, every new Fender I bought invariably arrived with a very poor setup. I used to ask myself: what was so darn hard about correctly setting up a brand new guitar, that Fender couldn’t be bothered to do that?
So when I tired of paying some shop $80, $100, $120 for a setup on a brand new guitar, I decided to figure out how to do it on my own. Before I did my very first guitar setup, I put off the work for months. “What if I ruin the neck forever by fussing with the truss rod?”, “What if it plays worse after I’m done?”, “What does ‘good’ look like?” These were worries I had. Eventually I experimented on a an old crappy fender clone and I came to realize that electric guitar setups are actually pretty easy, assuming you had clear directions and the right tools.
Here is the basic electric guitar setup procedure, in the order of how one ought to proceed.
Set Preliminary intonation
Adjust the first-string (the high “e” string) bridge saddle to the approximate scale length (25.5 inches on a Fender Tele or Strat), measuring from the inside of the nut to the point where the string contacts the bridge saddle. Now adjust the distance of the second-string saddle (‘b’ string), moving it back from the first saddle, using the diameter of the second string as a measurement. For example, If the second string is .011″ (0.3 mm), you would move the second-string saddle back .011″ (0.3 mm) from the first saddle. Move the third saddle back from the second saddle using the gauge of the third string as a measurement. The fourth-string saddle should be set parallel with the second-string saddle. Proceed with the fifth and sixth saddles with the same method used for saddles two and three. Although these numbers are small, this is just the preliminary intonation setting.
Fine tuning of the intonation will be set after the rest of the setup is complete.
Adjust Truss Rod
Remember:

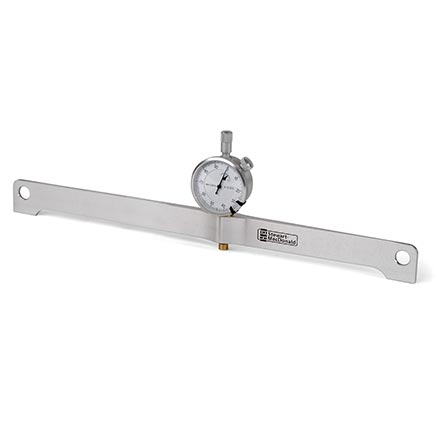
Adjust the truss rod so that the neck is perfectly flat while unstrung, a fretted straight-edge just barely touching the fretboard at the eighth fret, or a hair above. I use a fretted straight edge from Stewart Macdonald which, although extremely costly, they claim to be accurate to accuracy to +/- .0015″ per foot.

String the guitar and tune to pitch. Now adjust for the correct amount of backbow. Adjust the truss rod such that the relief (daylight) measured at the eighth fret using the fretted straight edge matches the values in the table below. The Fender specs for the neck relief are:
| Neck Radius | Relief |
| 7.25″ | .012″ (0.3 mm) |
| 9.5″ to 12″ | .010″ (0.25 mm) |
| 14″ to 17″ | .008″ (0.2 mm) |
Alternatively, my own preferences (with neck strung and tuned to pitch) is to measure the height of the fifth fret in comparison to the first and twelfth frets. The idea is that if the fifth fret is lower than the 12th and 1st frets, then the neck has some backbow, which is what you want. The way I do this is to use a precision tool from Stewmac to measure the fifth fret height. I prefer a value of 0.090″, with each end of the precision tool on either the 12th or first fret.
| Fret | Relief |
| 5th | 0.090″ |
I use this instrument to measure backbow, from Stewmac.
Adjust the Action
Re-tune the guitar to pitch. There are two parts to adjusting the action. First, measure the string height above the first fret. Suggested starting values:
| String(s) | Relief |
| E, A | .020″ |
| D, G | .018″ |
| B, e | .016″ |
If necessary, cut the nut slots to spec, using a feeler gauge to measure relief. If you are cutting the nut slots, make sure to use nut slot files of the appropriate width and please do this very carefully! There is no recovery from cutting too deeply so best to file a bit and re-check relief, over and over, until the string is at the correct height. The nut slots need only be adjusted one time for the life of the neck.
The second part of adjusting the action is to first measure string height at the 17th fret.
The Fender specs for string height are:
| Neck Radius | String Height, Bass Side (“E”) | Treble Side (“e”) |
| 7.25″ | 5/64″ (2 mm) | 4/64″ (1.6 mm) |
| 95″ to 12″ | 4/64″ (1.6 mm) | 4/64″ (1.6 mm) |
| 15″ to 17″ | 4/64″ (1.6 mm) | 3/64″ (1.2 mm) |
Adjust the low E string and then the high e string to the appropriate heights. Now adjust the height of the middle four saddles so that the string height matches the neck radius at the last fret. I use a Stewmac string radius tool to adjust the saddle height, as in the picture below. For compound radius necks, the radius should be one or two sizes larger than the neck radius at the last fret. You can tell when you have the correct radius by plucking the string behind the radius tool, which is pulled upwards against the strings. You should not hear the string ‘ring out’, it should be a dull plunking noise.

Pickup Height
Re-tune the strings. Now depress the strings at the last fret. Measure the distance from the bottom of the first and sixth strings to the top of the pole pieces on the pickup. A good rule of thumb is that the distance should be greatest at the sixth-string neck pickup position, and closest at the first-string bridge pickup position. The Fender official specs are below. Adjust the pickup height to approximate these values. Don’t mess with the string action.
| Bass Side | Treble Side | |
| Texas Specials | 8/64″ (3.6 mm) | 6/64″ (2.4 mm) |
| Vintage style | 6/64″ (2.4 mm) | 5/64″ (2 mm) |
| Noiseless™ Series | 8/64″ (3.6 mm) | 6/64″ (2.4 mm) |
| Standard Single-Coil | 5/64″ (2 mm) | 4/64″ (1.6 mm) |
| Humbuckers | 4/64″ (1.6 mm) | 4/64″ (1.6 mm) |
Final Intonation
Re-tune the strings again. Now adjust intonation using saddle intonation adjustment screws. I use an electronic tuner and adjust until the string has the correct pitch both open and when lightly fretted at the twelfth fret (one octave higher).
Re-tune the strings one more time. Presto, your guitar is set up correctly! If you want to raise or lower the action, now just follow the directions above.
Neck Geometry
If you are putting together your own guitar, it will frequently be the case that the neck and the neck pocket in the guitar body are not perfectly cut, geometrically speaking. It can appear impossible to get the strings low enough or high enough to set a reasonable action, no matter how much you adjust the truss rod or play with string height. In cases like this, you will need to ‘shim’ the neck.
‘Shimming the neck’ simply means adding material to the front or rear of the neck pocket in the guitar, to change the neck/body angle. Many things can be used for shims – playing cards, business cards, etc. The idea is to cut a thin strip, maybe 3/4″ x the width of the neck pocket, and place the shim as close to the body or as far away from the body as possible, depending on how you want to change the geometry. It may seem surprising that a 3/4″ x 2 1/2″ piece of a playing card, appropriately placed, can change the neck / body geometry but it can and this is a surprisingly effective solution.
Below is an example of a ‘shim’ used on a Warmoth body.

Good luck!
