
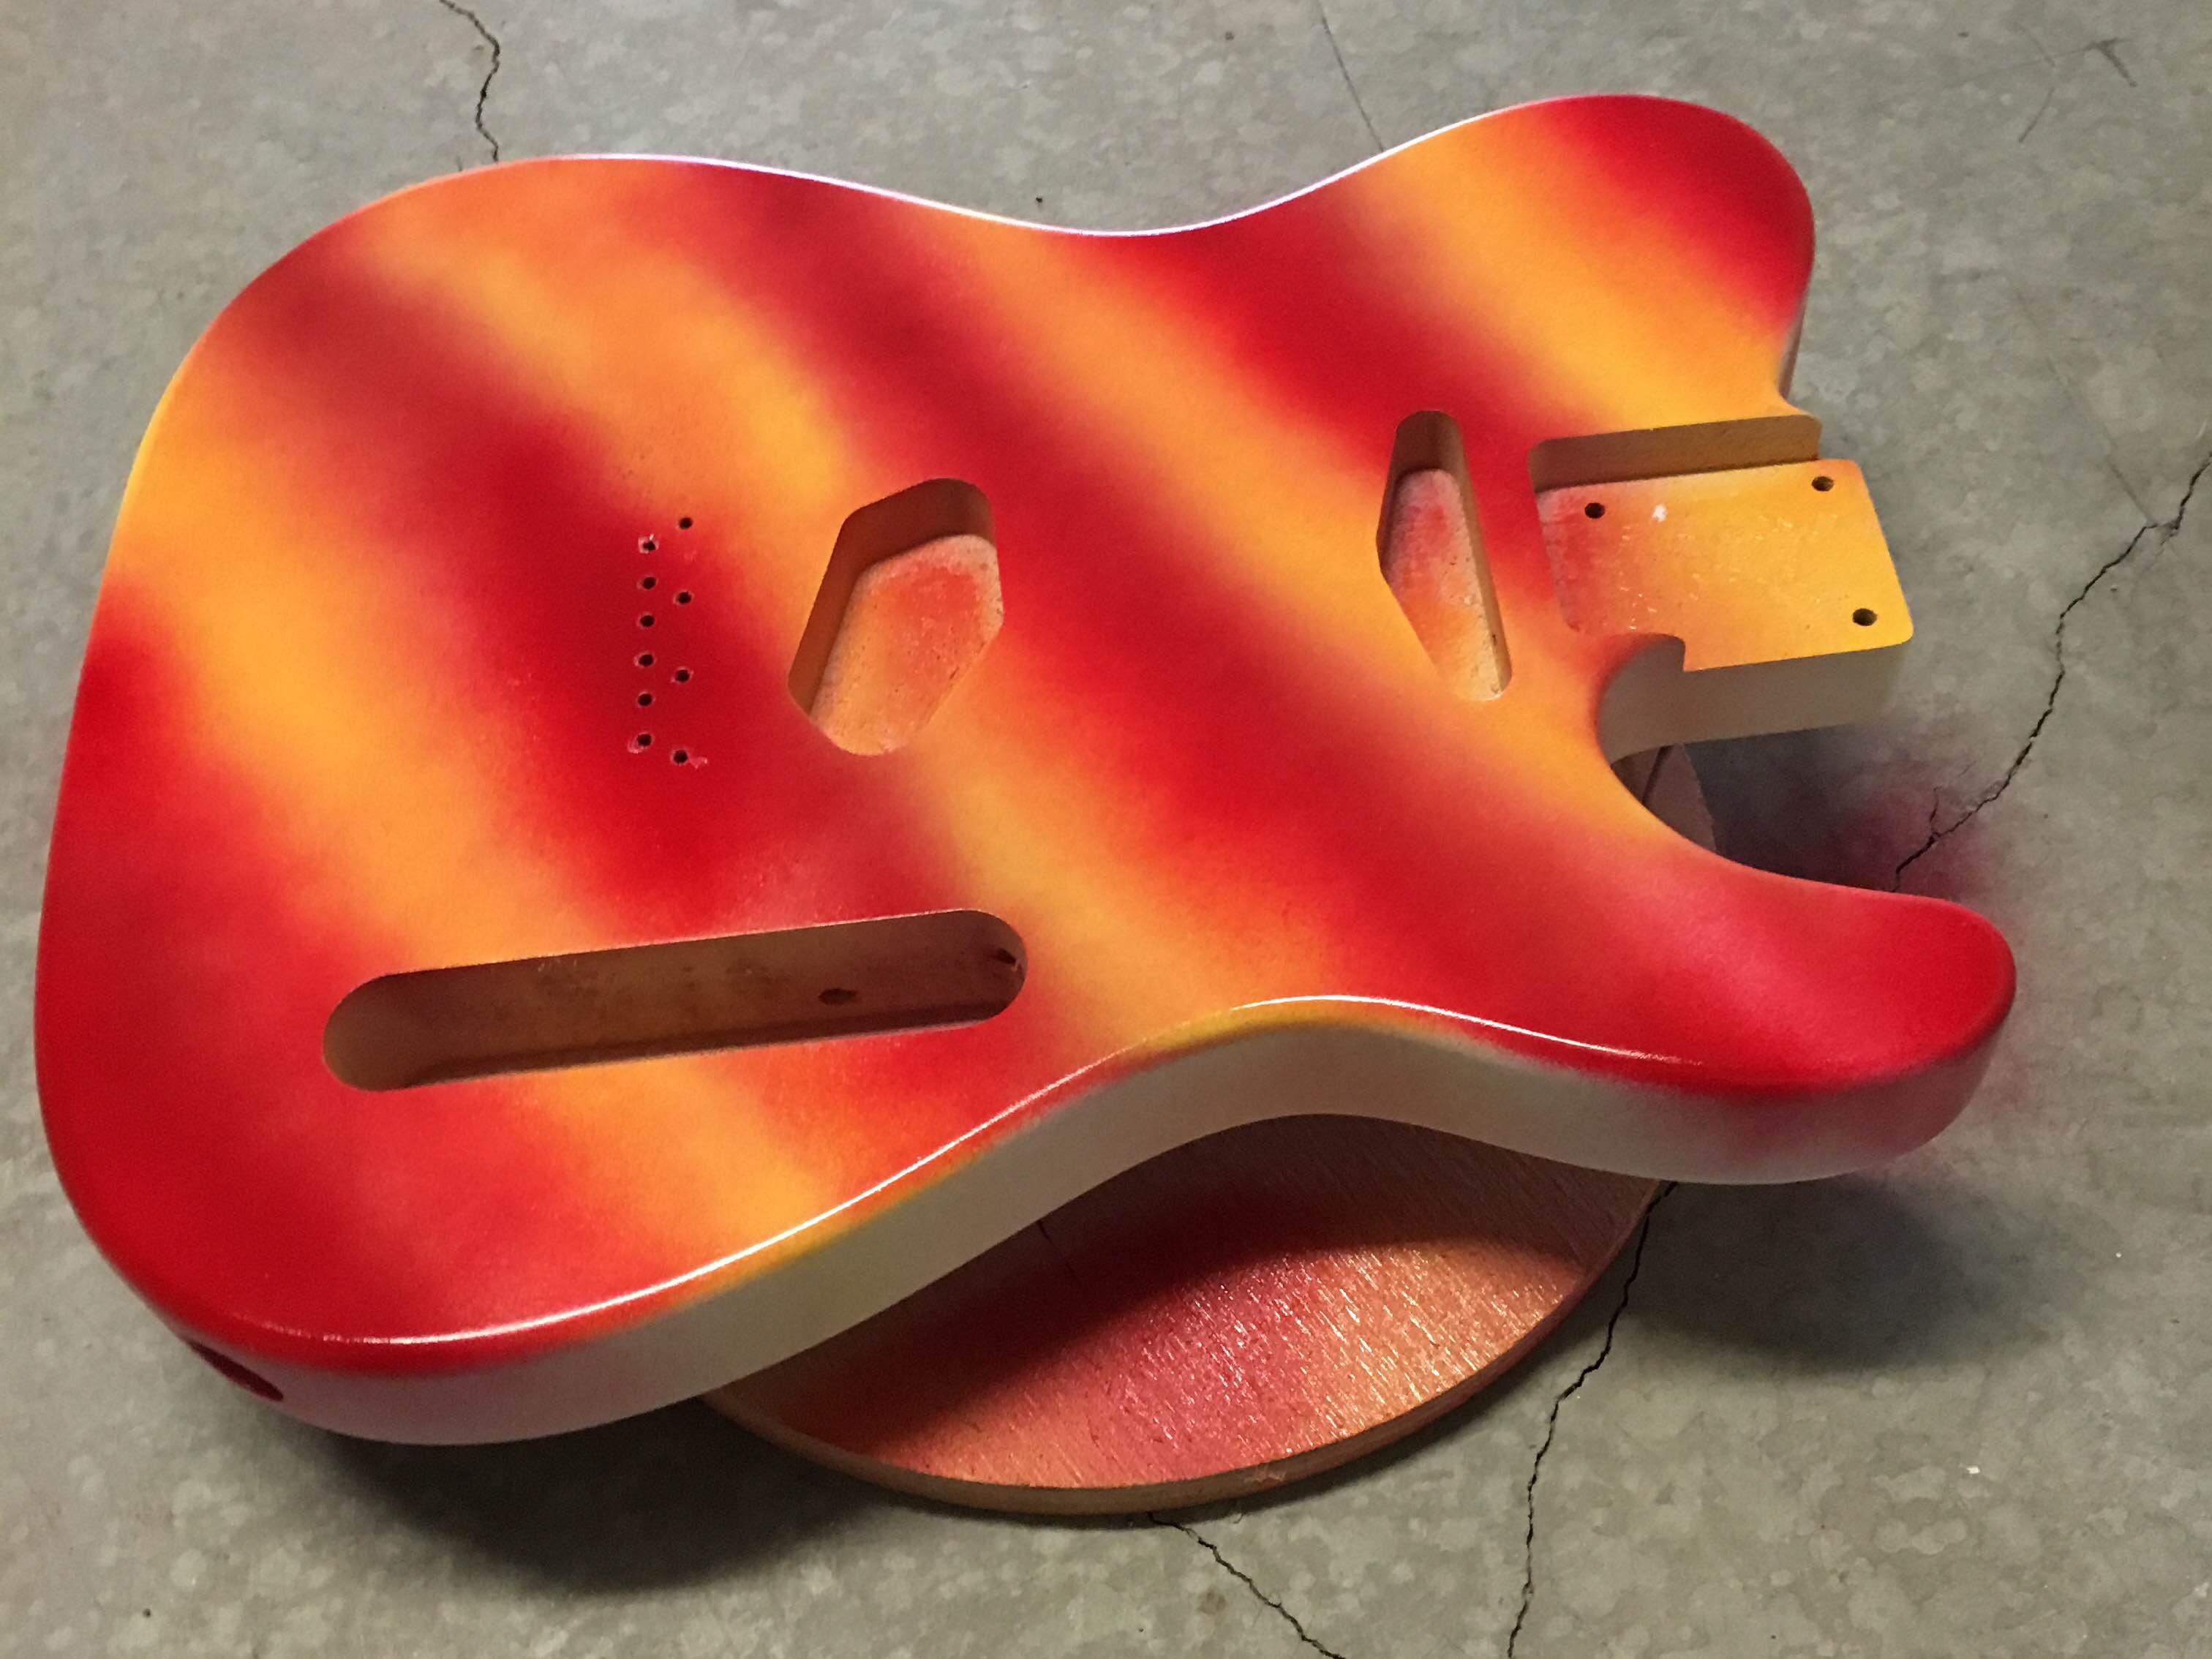
The Psychadelicaster is my first attempt to paint a guitar. I started with an unfinished Telecaster body (made from alder). The first step was to lay down some undercoating, red and yellow stripes.
Then I tried an experiment which I saw on YouTube. I know, you are already rolling your eyes already. But since this is meant to be a learning experience, what the heck?
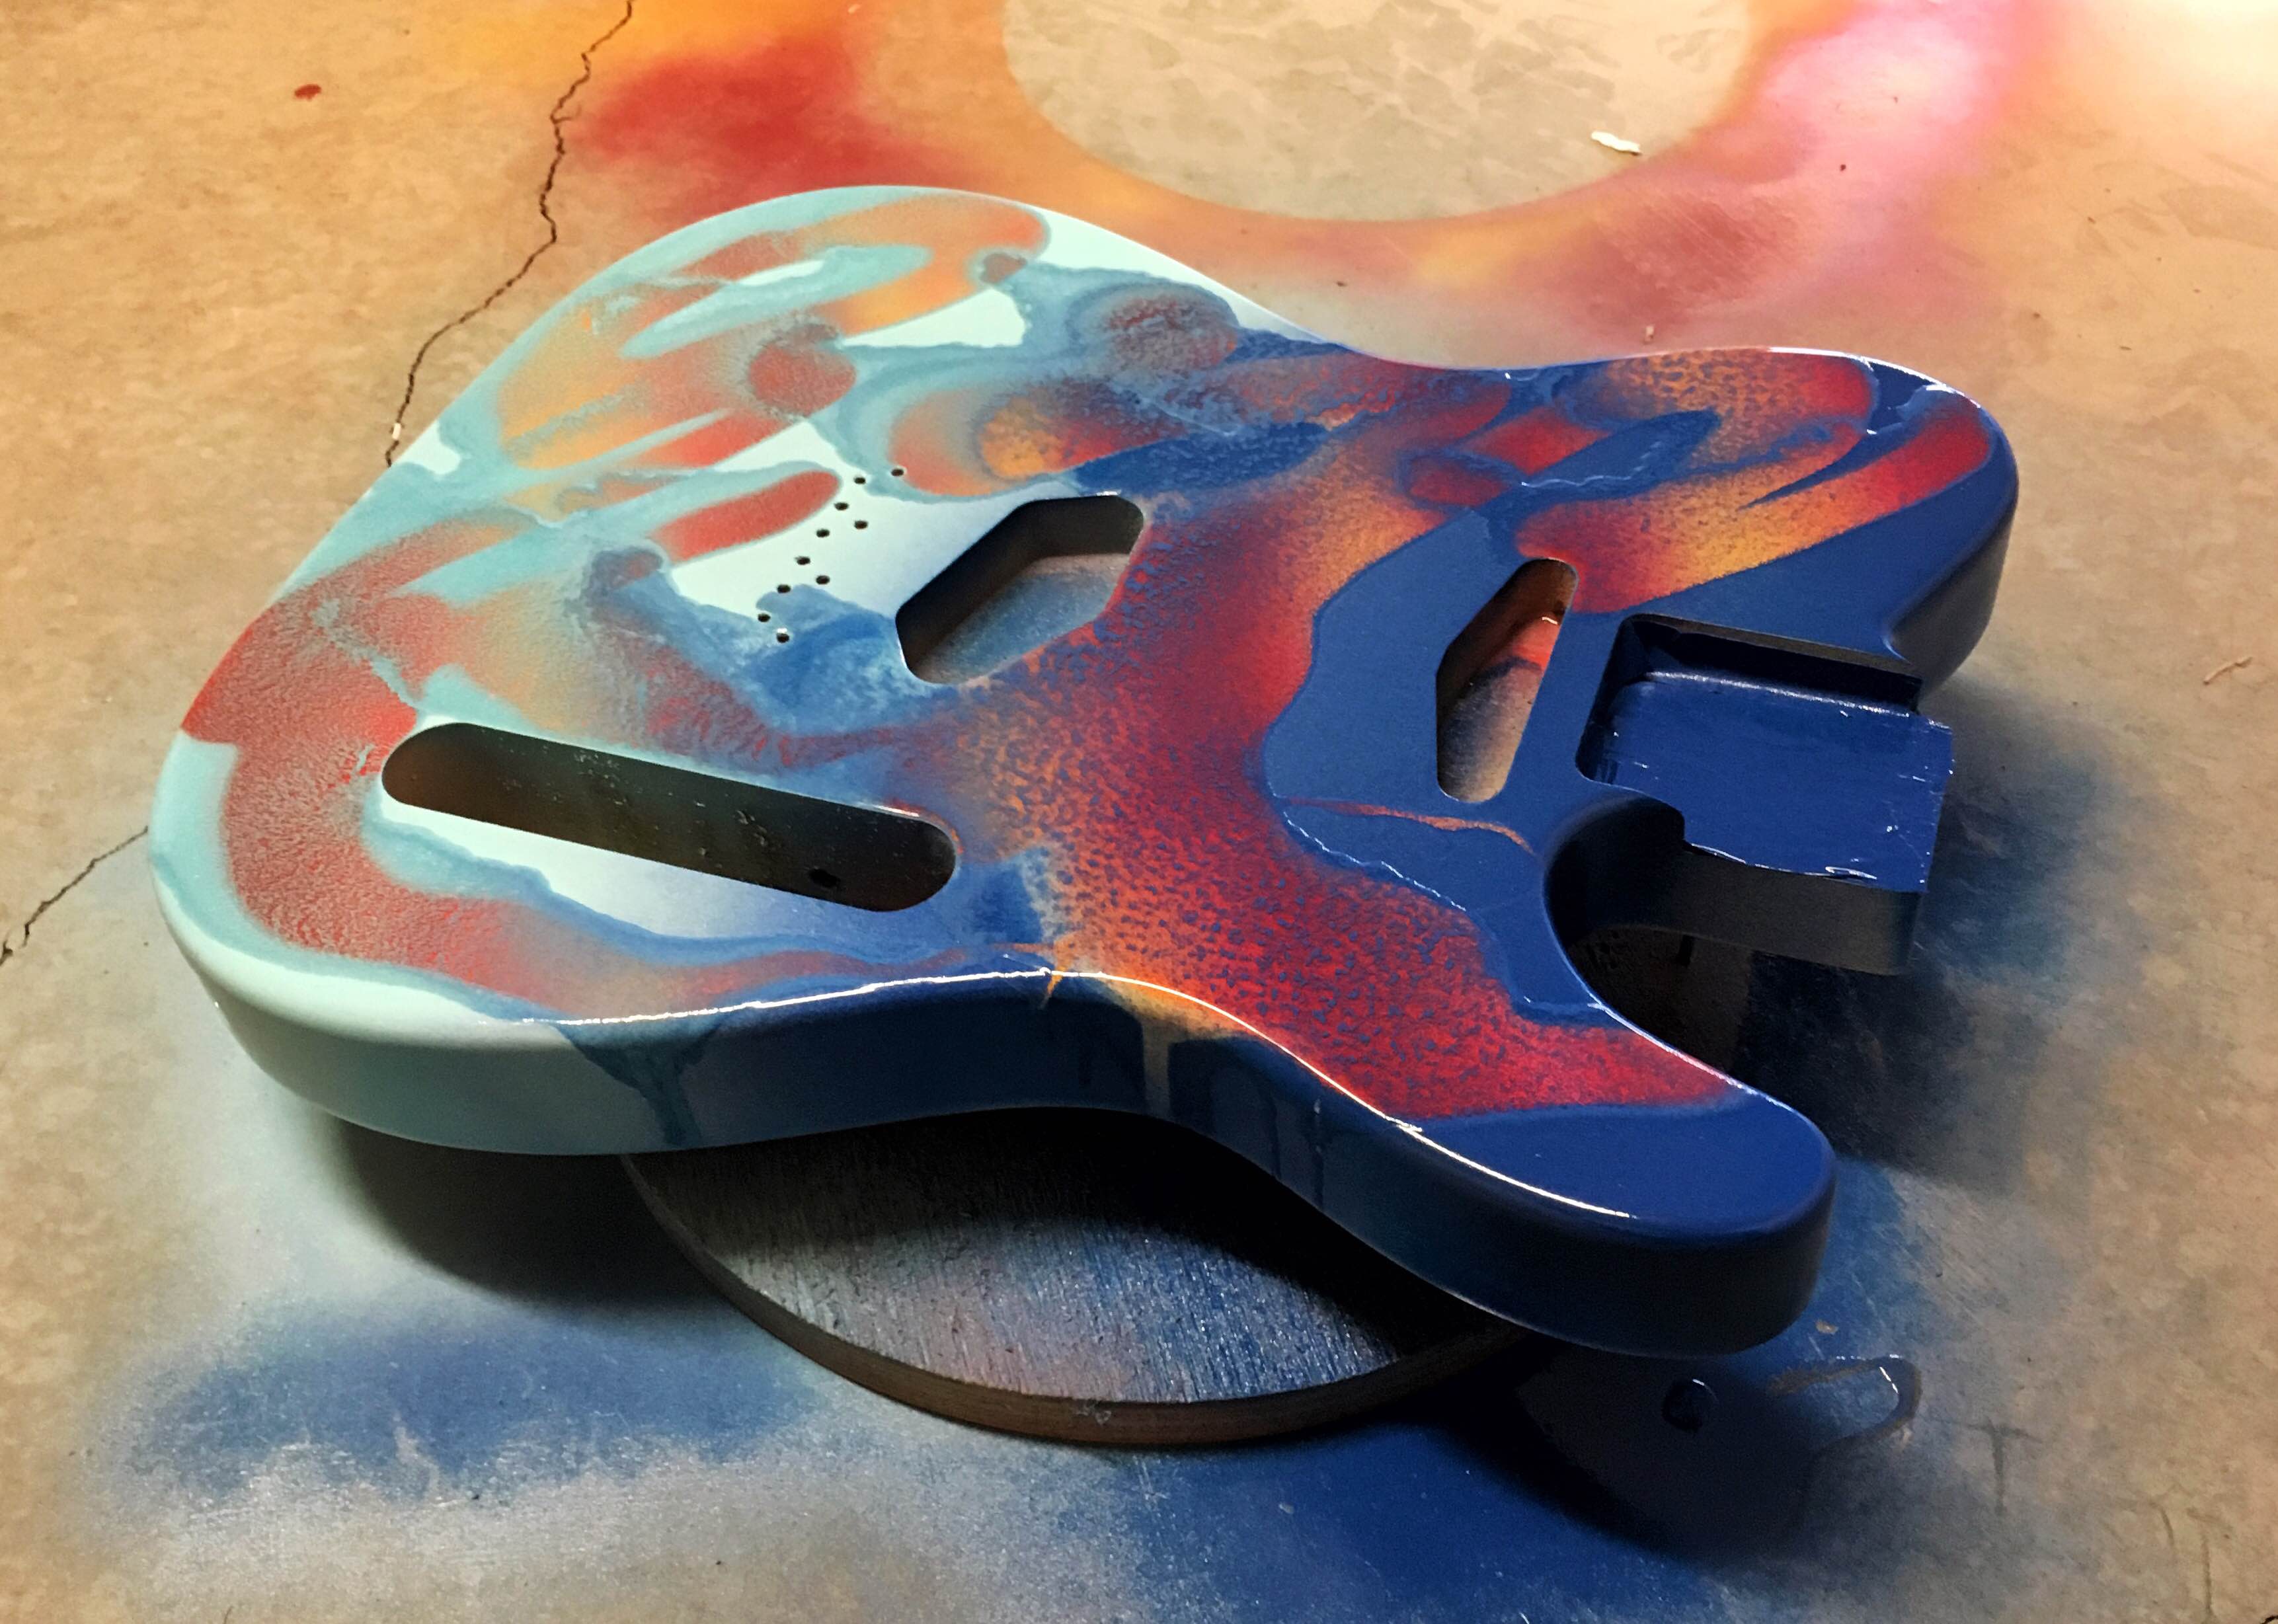
The experiment is to dribble dish soap all over the guitar and then spray a second coat of paint. The idea is that the paint won’t stick to the dish soap and it will leave the patterns underneath uncovered. So here is day 1, where I soaped and then painted the guitar. I used two top coats, one light blue and one dark blue. The soap was too runny and it ran all over the place but luckily the paint dries quickly enough that the basic effect seems to be intact.

After about 3 hours, I wiped all the soap off and hung the guitar to dry overnight. I’ll do a final cleaning tomorrow. Here is the wiped guitar hanging to dry.


Notice the string holes? It looks like water has gotten in there and is delaminating the wood. I should have taped off the string holes after the first coat of paint. I pressed the guitar under some weight and eventually flattened out the wood.
After drying and then clear coating the body, it was time for assembly.

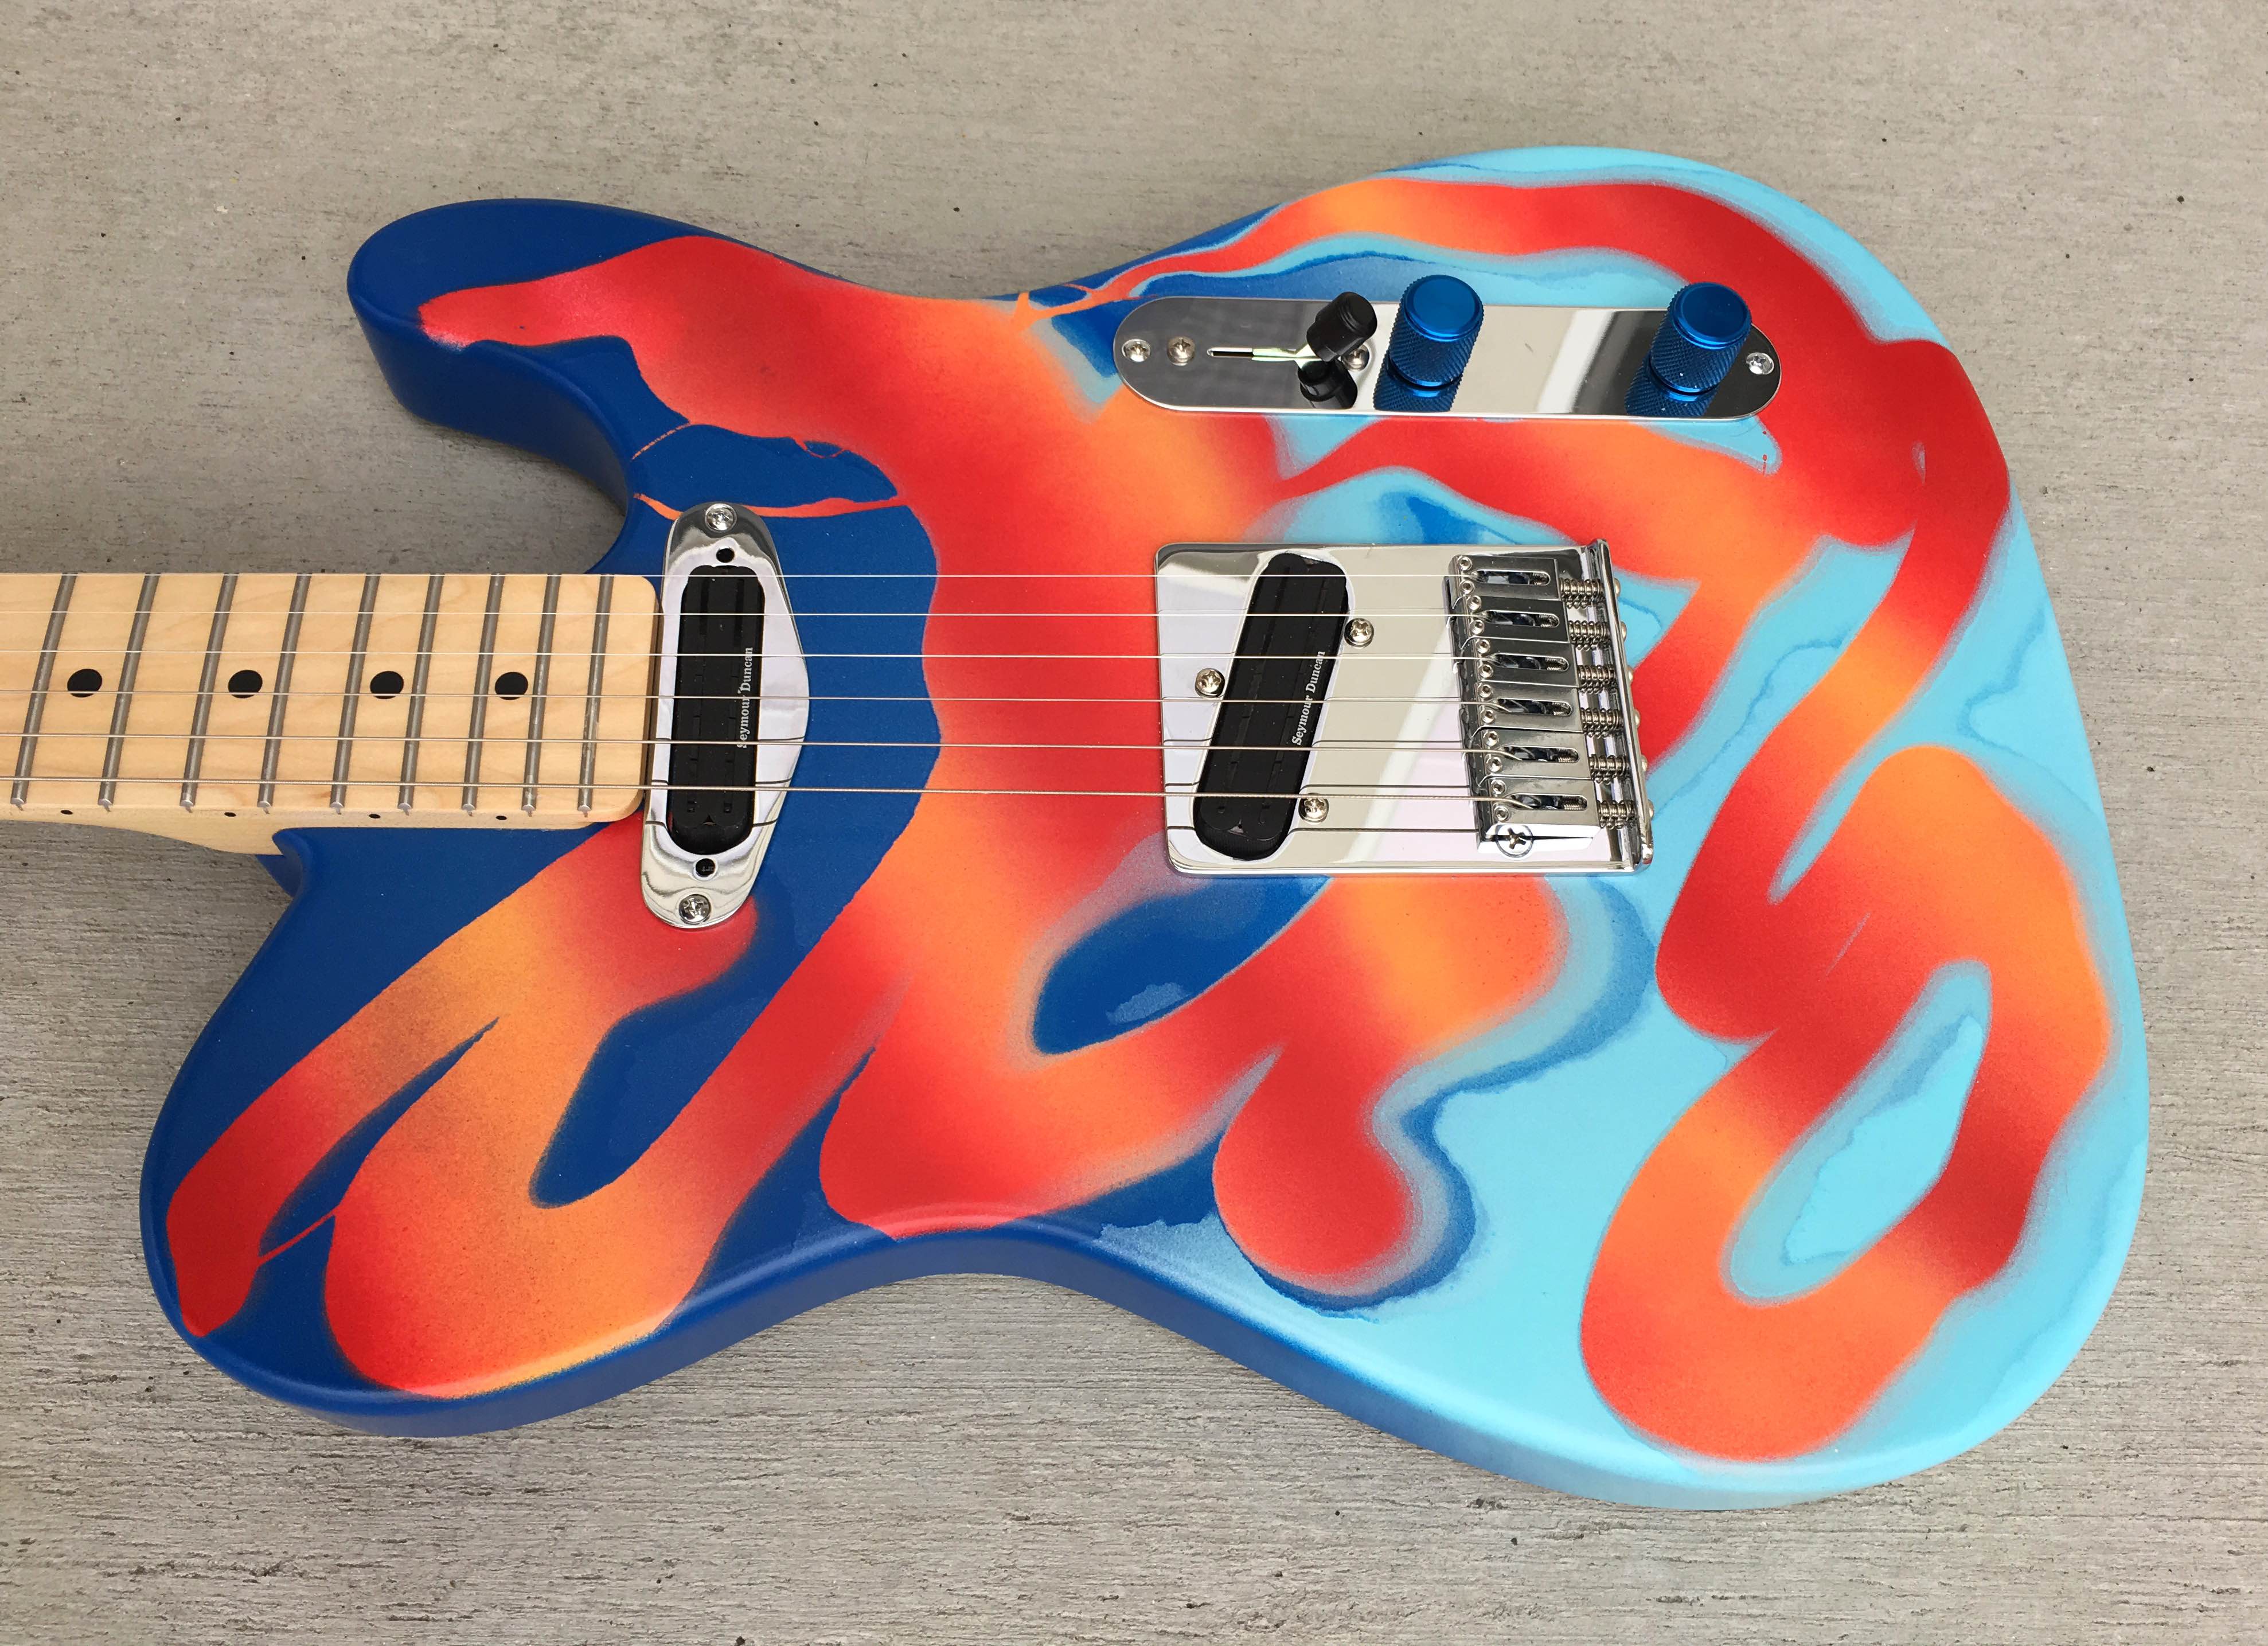
Check out these blue metal knobs, courtesy of Anotone!

And my 9.5 inch constant radius neck with 8-38 strings! I wanted to see what Billy Gibbons feels when he plays but I wasn’t prepared to go all the way to 7s.

And the other end:

The guitar sat this way for about a year. But I’d had a spare neck lying around for some time – an ebony neck for a Telecaster which was never constructed. At the same time, I have been meaning to change the strings on guitar #3 because when I built it, I was experimenting with 8-38 strings and I have learned over time I do not like such thin strings. My lack of finesse while playing tends to stretch the strings I fret and enough so that one can actually hear notes on the high string going sharp. I find that with 9s / 10s I do not hear the same thing. I decided today to see what the guitar looked like with an ebony neck and, simultaneously, to change the string gauge.
When I used to work in an auto repair shop, the jargon we used when fixing something on a customer’s car was to “R&R” whatever we were fixing, meaning remove and replace. So today I decided to R&R my neck.
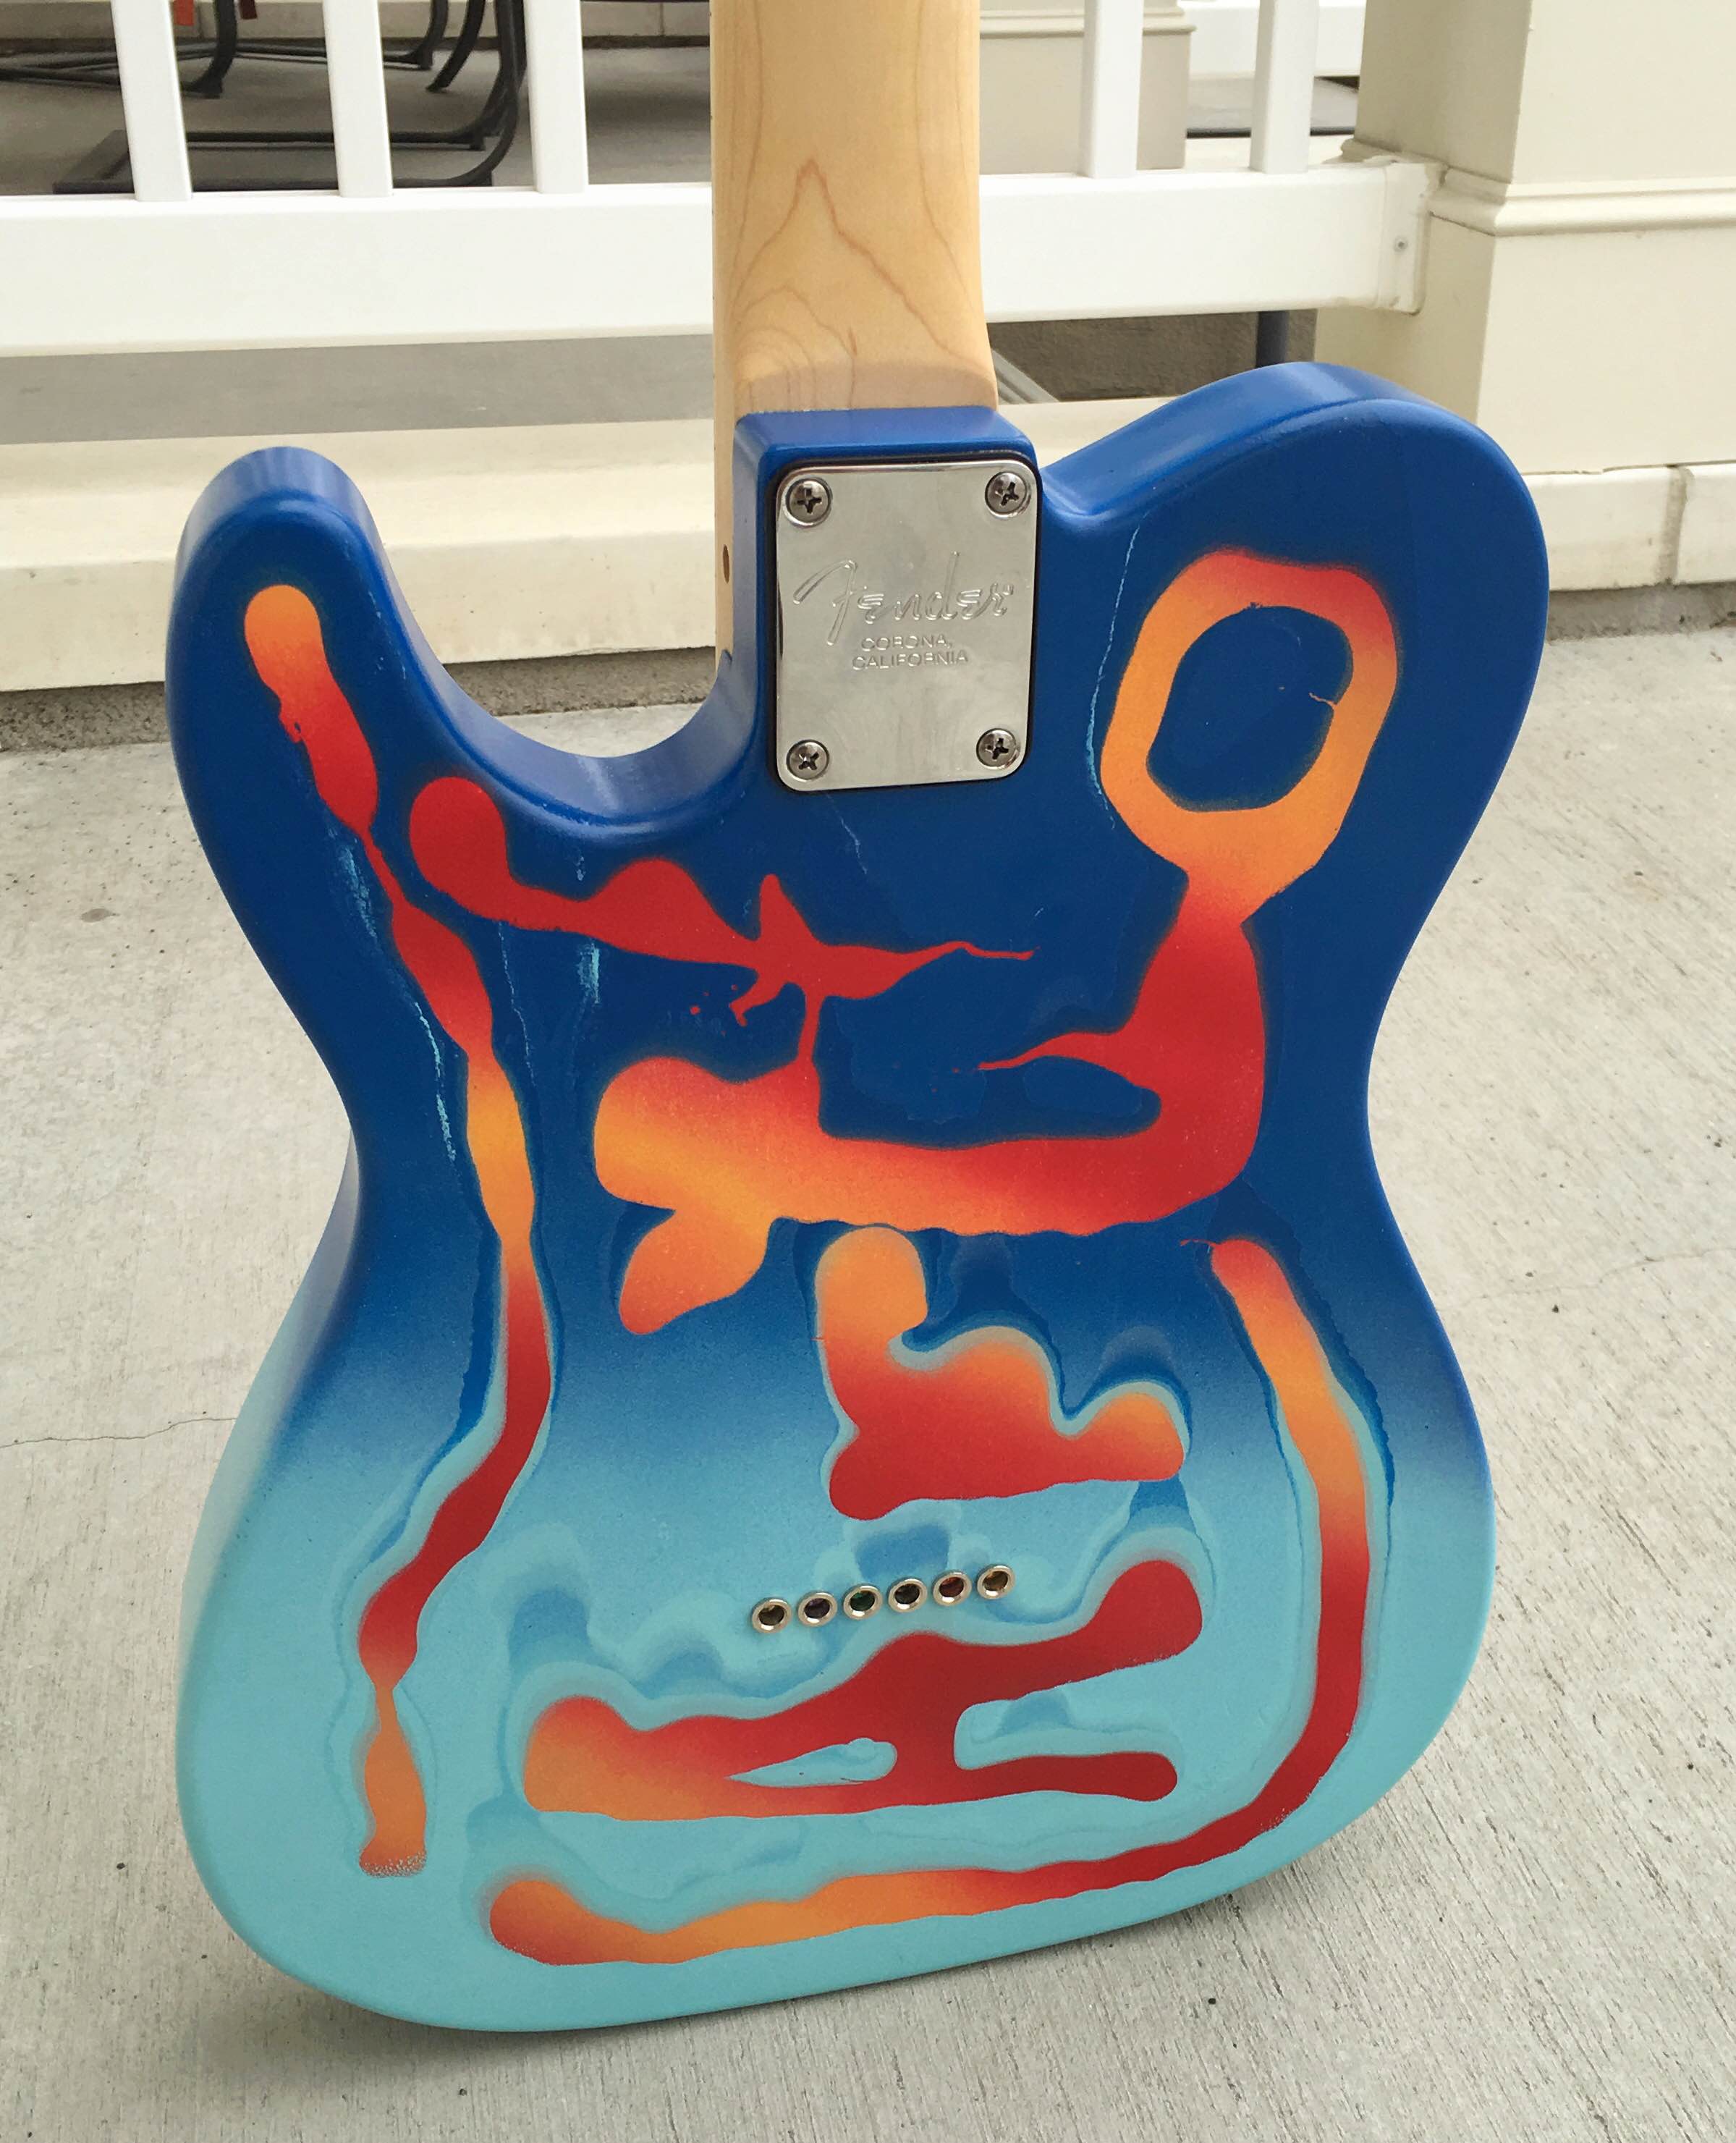
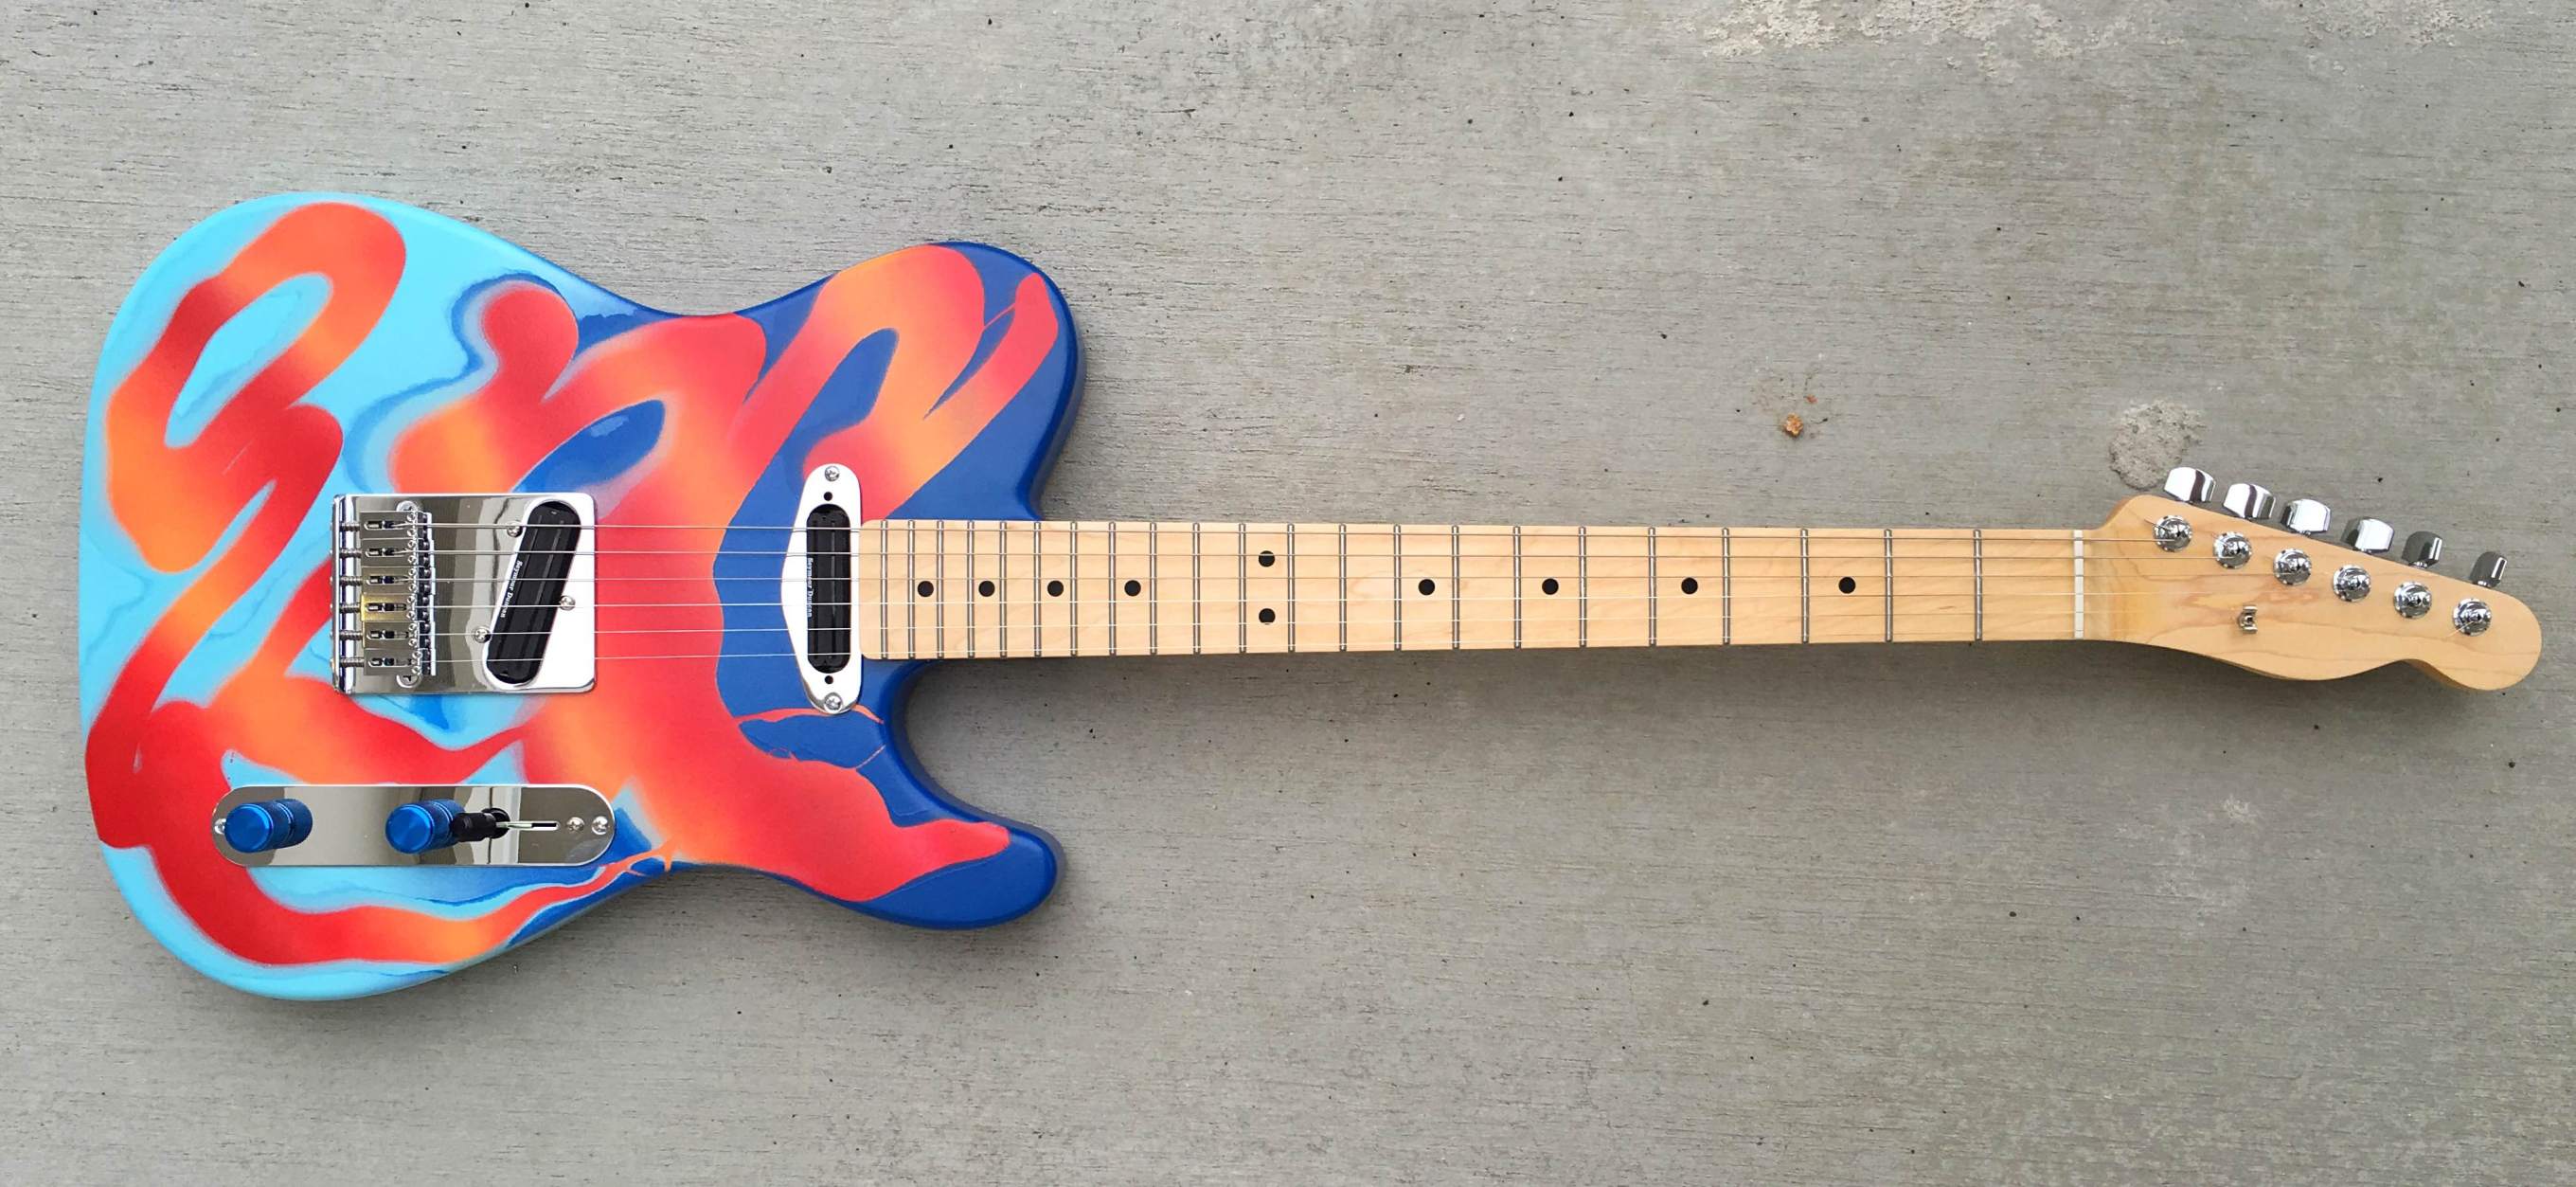
This is the Pstchadelicaster, the guitar with which I started:
In this post, I’ll describe what I did to change the neck.
The first step is to get the new neck as straight as possible. Using a 5.5mm Allen key, I adjusted the truss rod using the coarse adjustment at the base of the neck, until the neck had an ever-so-slight bow to it.

To ensure the neck is almost straight, I use a special notched straightedge, cut for the Fender scale length (25.5 inches).
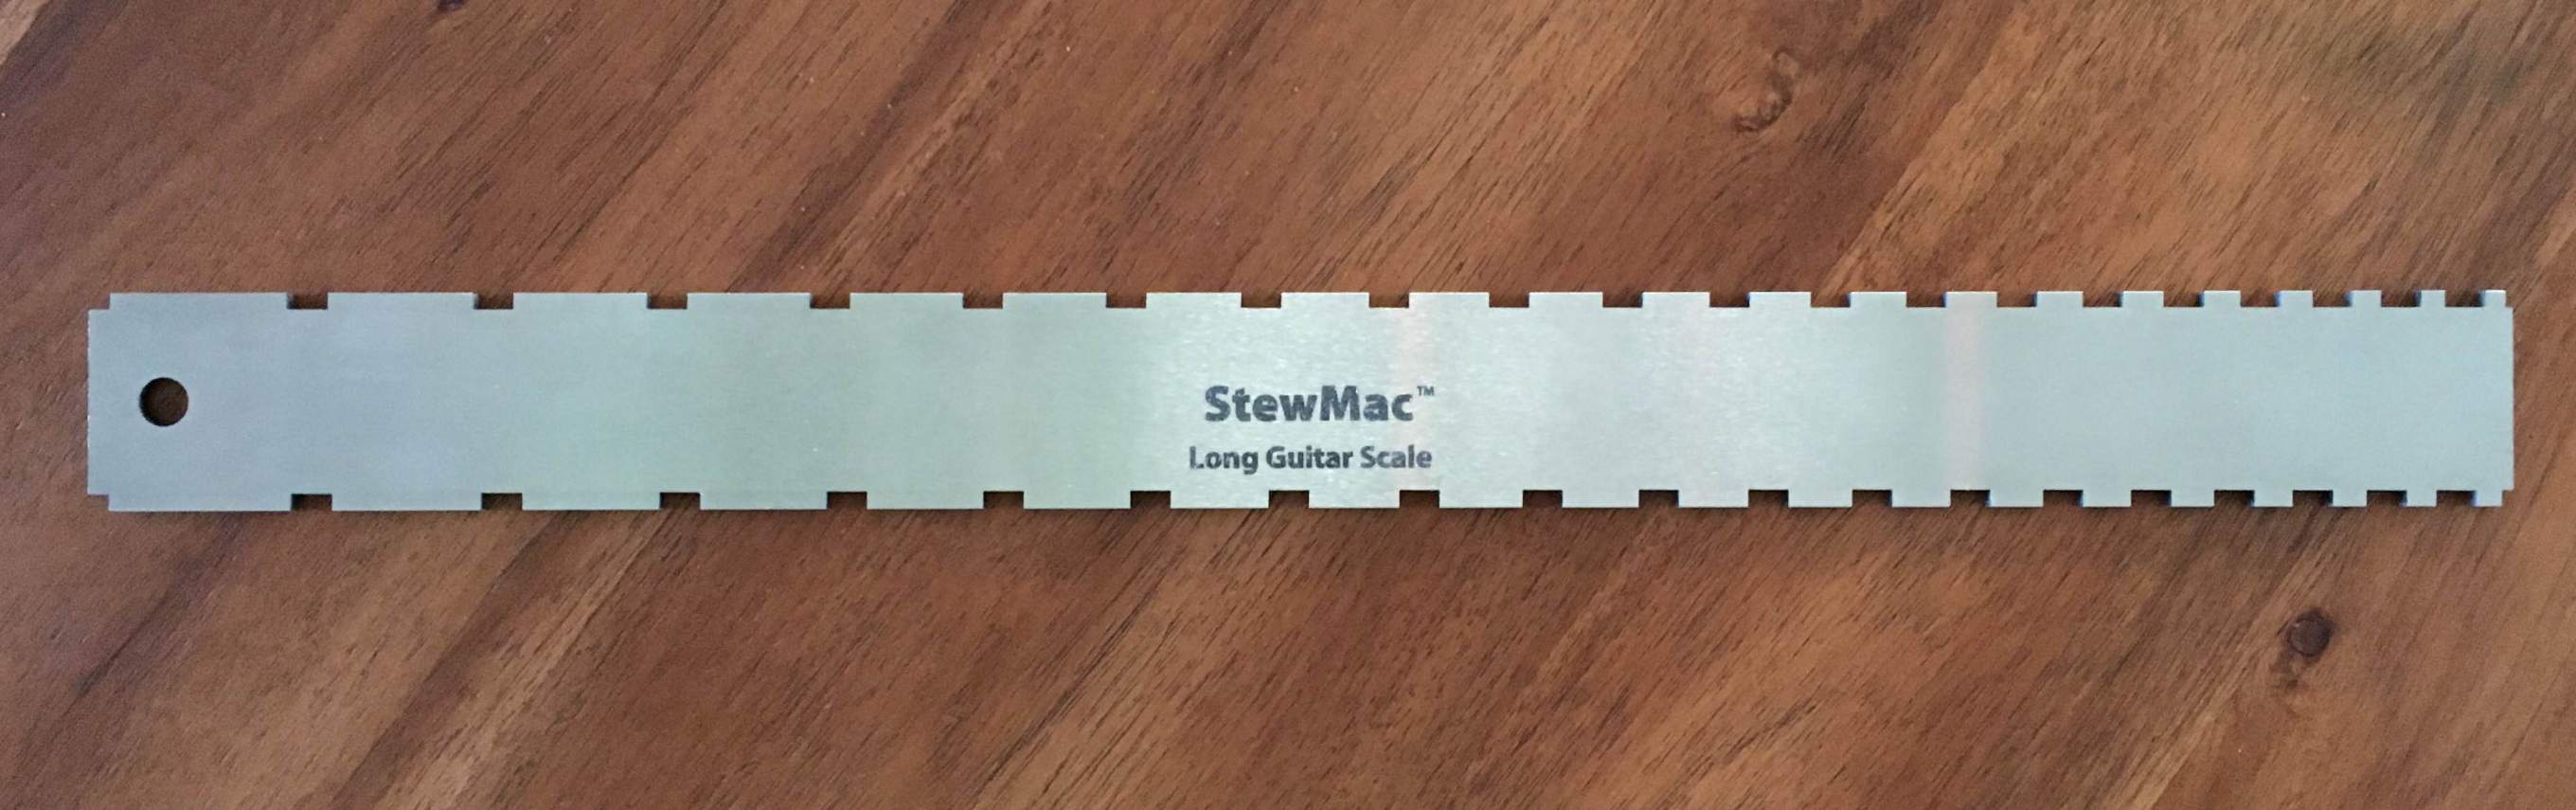
This tool makes it straightforward to identify the neck’s relief or bow, simply by looking for daylight under the straightedge. In the photo below you can see the bow (upwards curl) of the neck built in from the factory, before I adjusted anything. The photo is taken approximately at the neck mid-point.

Here is the neck after adjusting the Truss rod to reduce the relief.

I left a very small amount of relief or curl in the neck. Further adjustments will need to wait until the neck is bolted on to the body and strung to pitch.
The next step is to check the fret height, to make sure they are all consistent. I use a small straightedge which covers 3 frets at a time. The test is to try to rock back and forth, making sure the straightedge is solid and firm and does not rock. Start at the top, and move down the neck fret by fret, checking for low or high frets. If one is found, the straightedge will rock and then I will need to cut it down to match the others. Luckily on this neck, the frets are all of correct height and no fret sanding is needed.
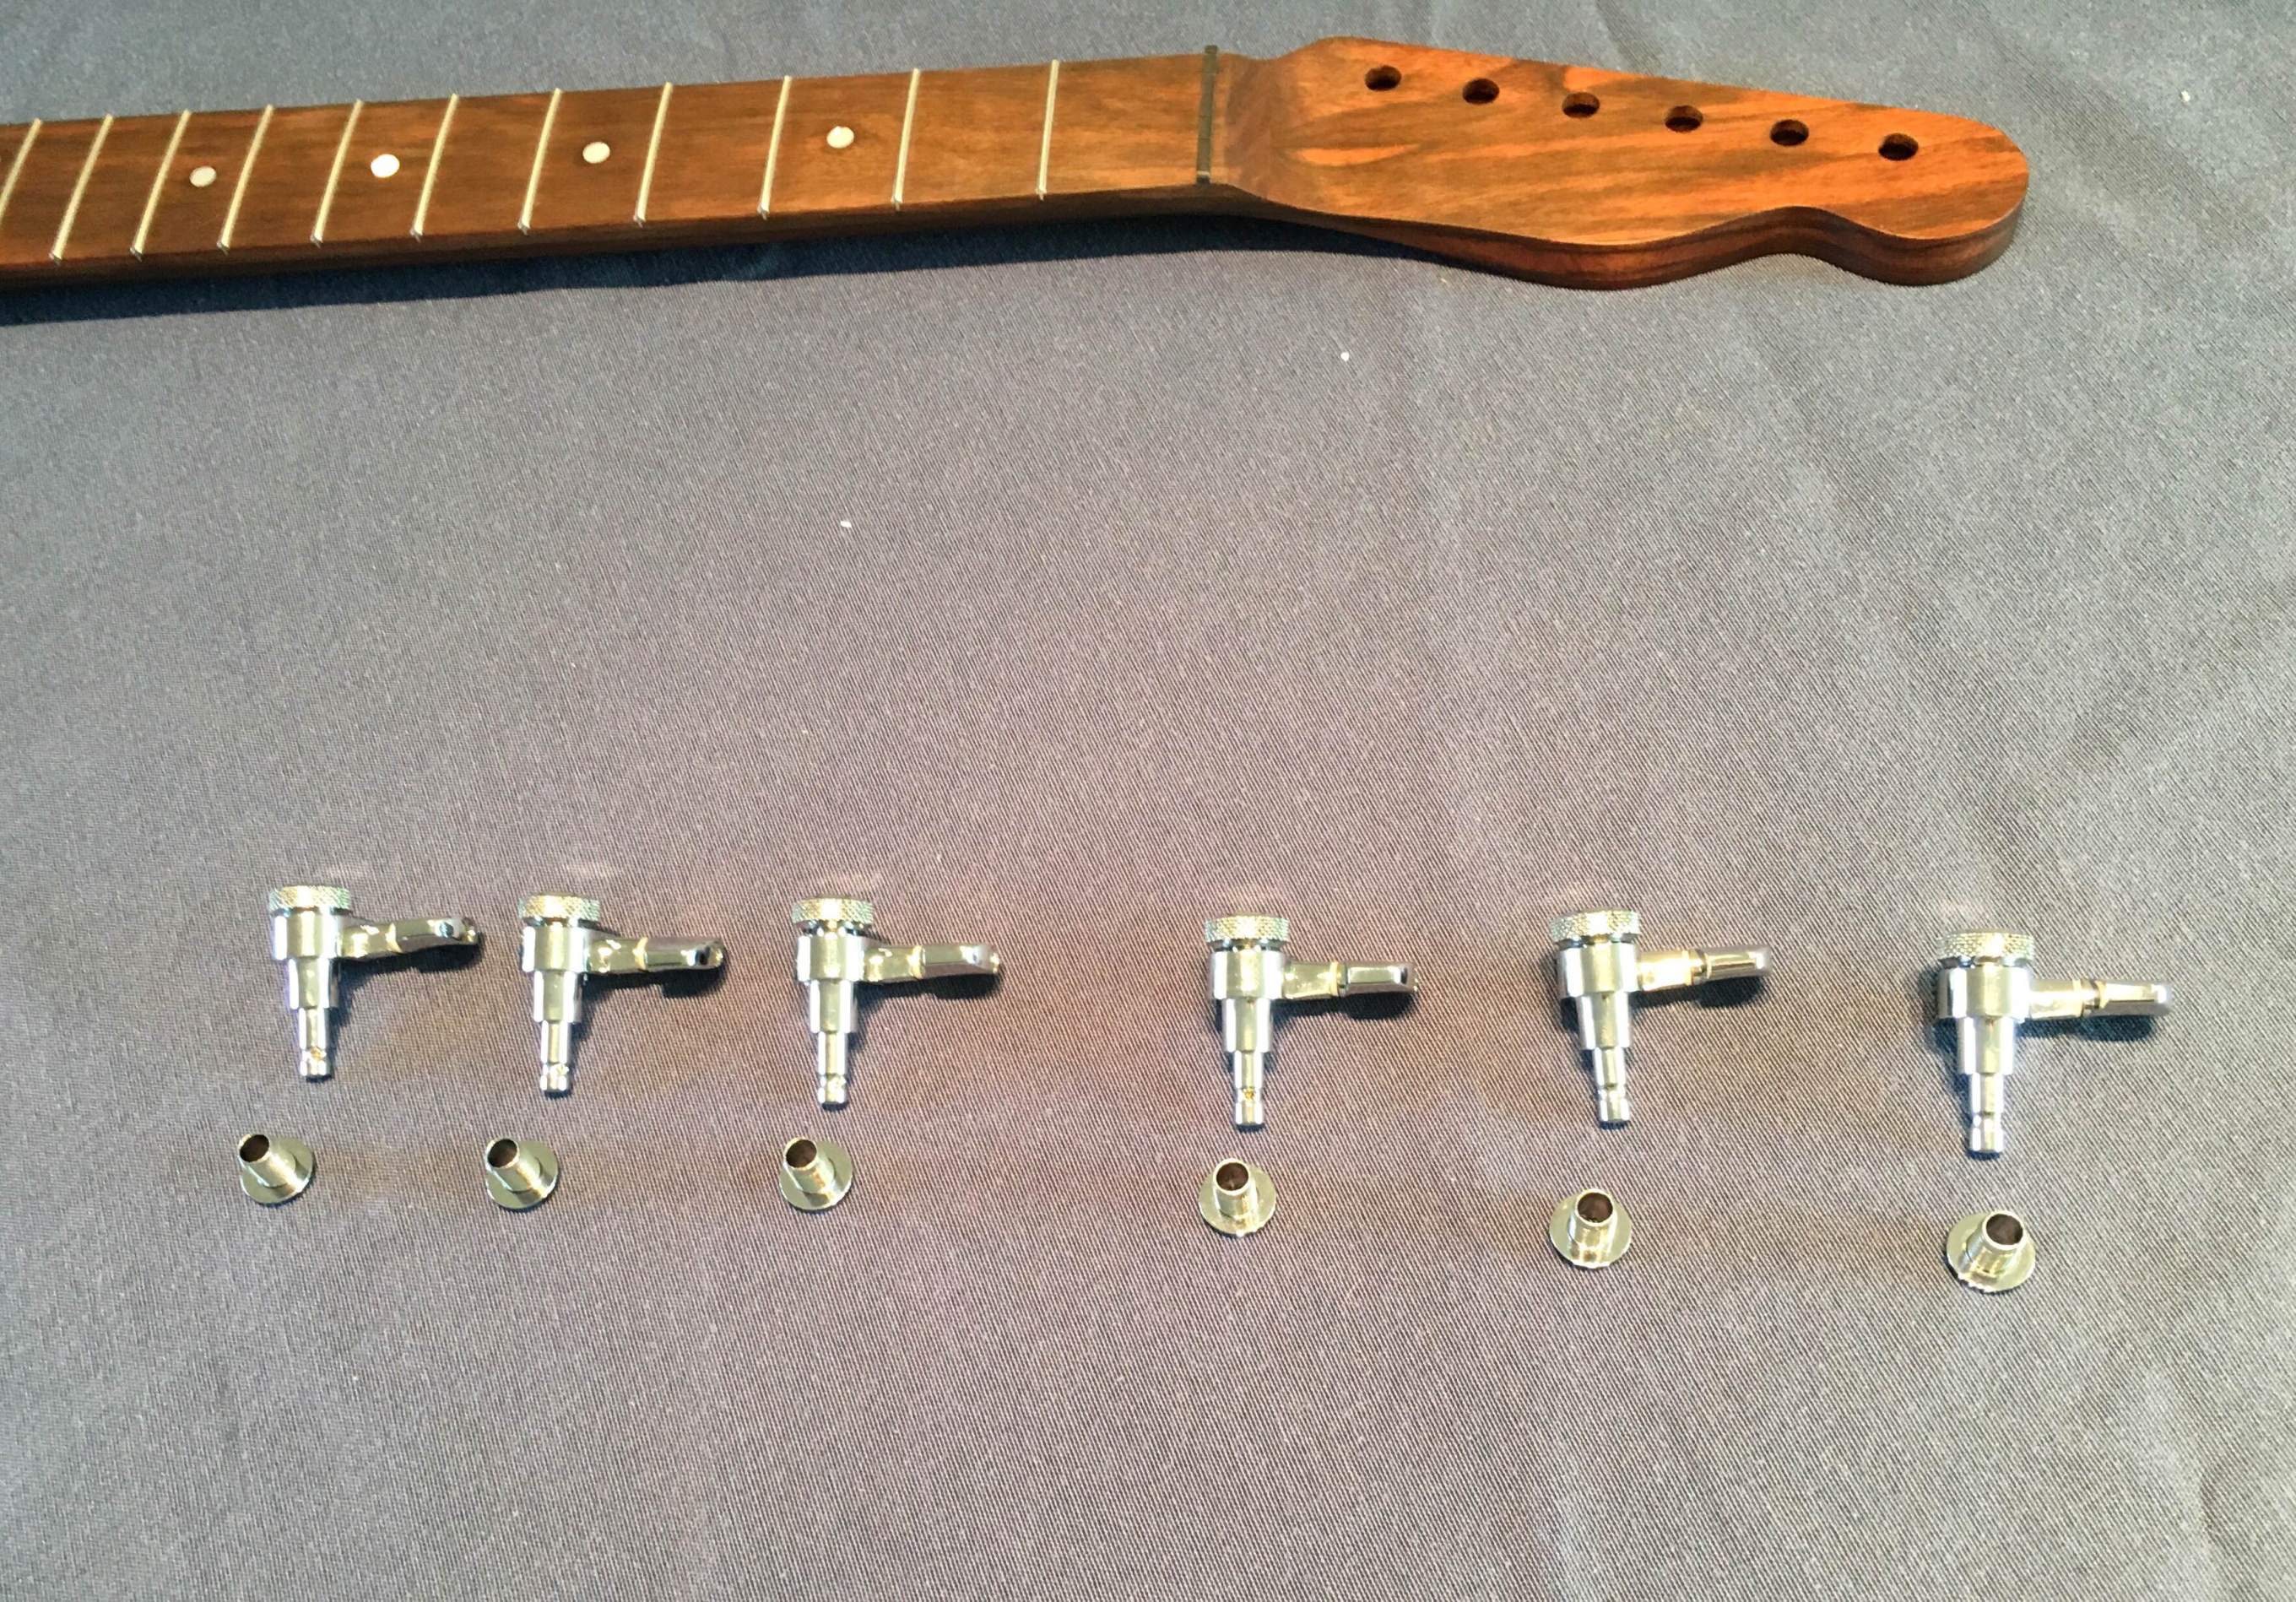
Then it is time to install the tuning machines. I always use Schaller locking tuners because I have found the guitar tuning to be extremely stable with these tuners and because they feel like precision-crafted machines. Yes, I know that is a goofy thing to say but I like precision machines 🙂 These tuning machines, when sold in a batch of six, come in two lengths, three of each length.
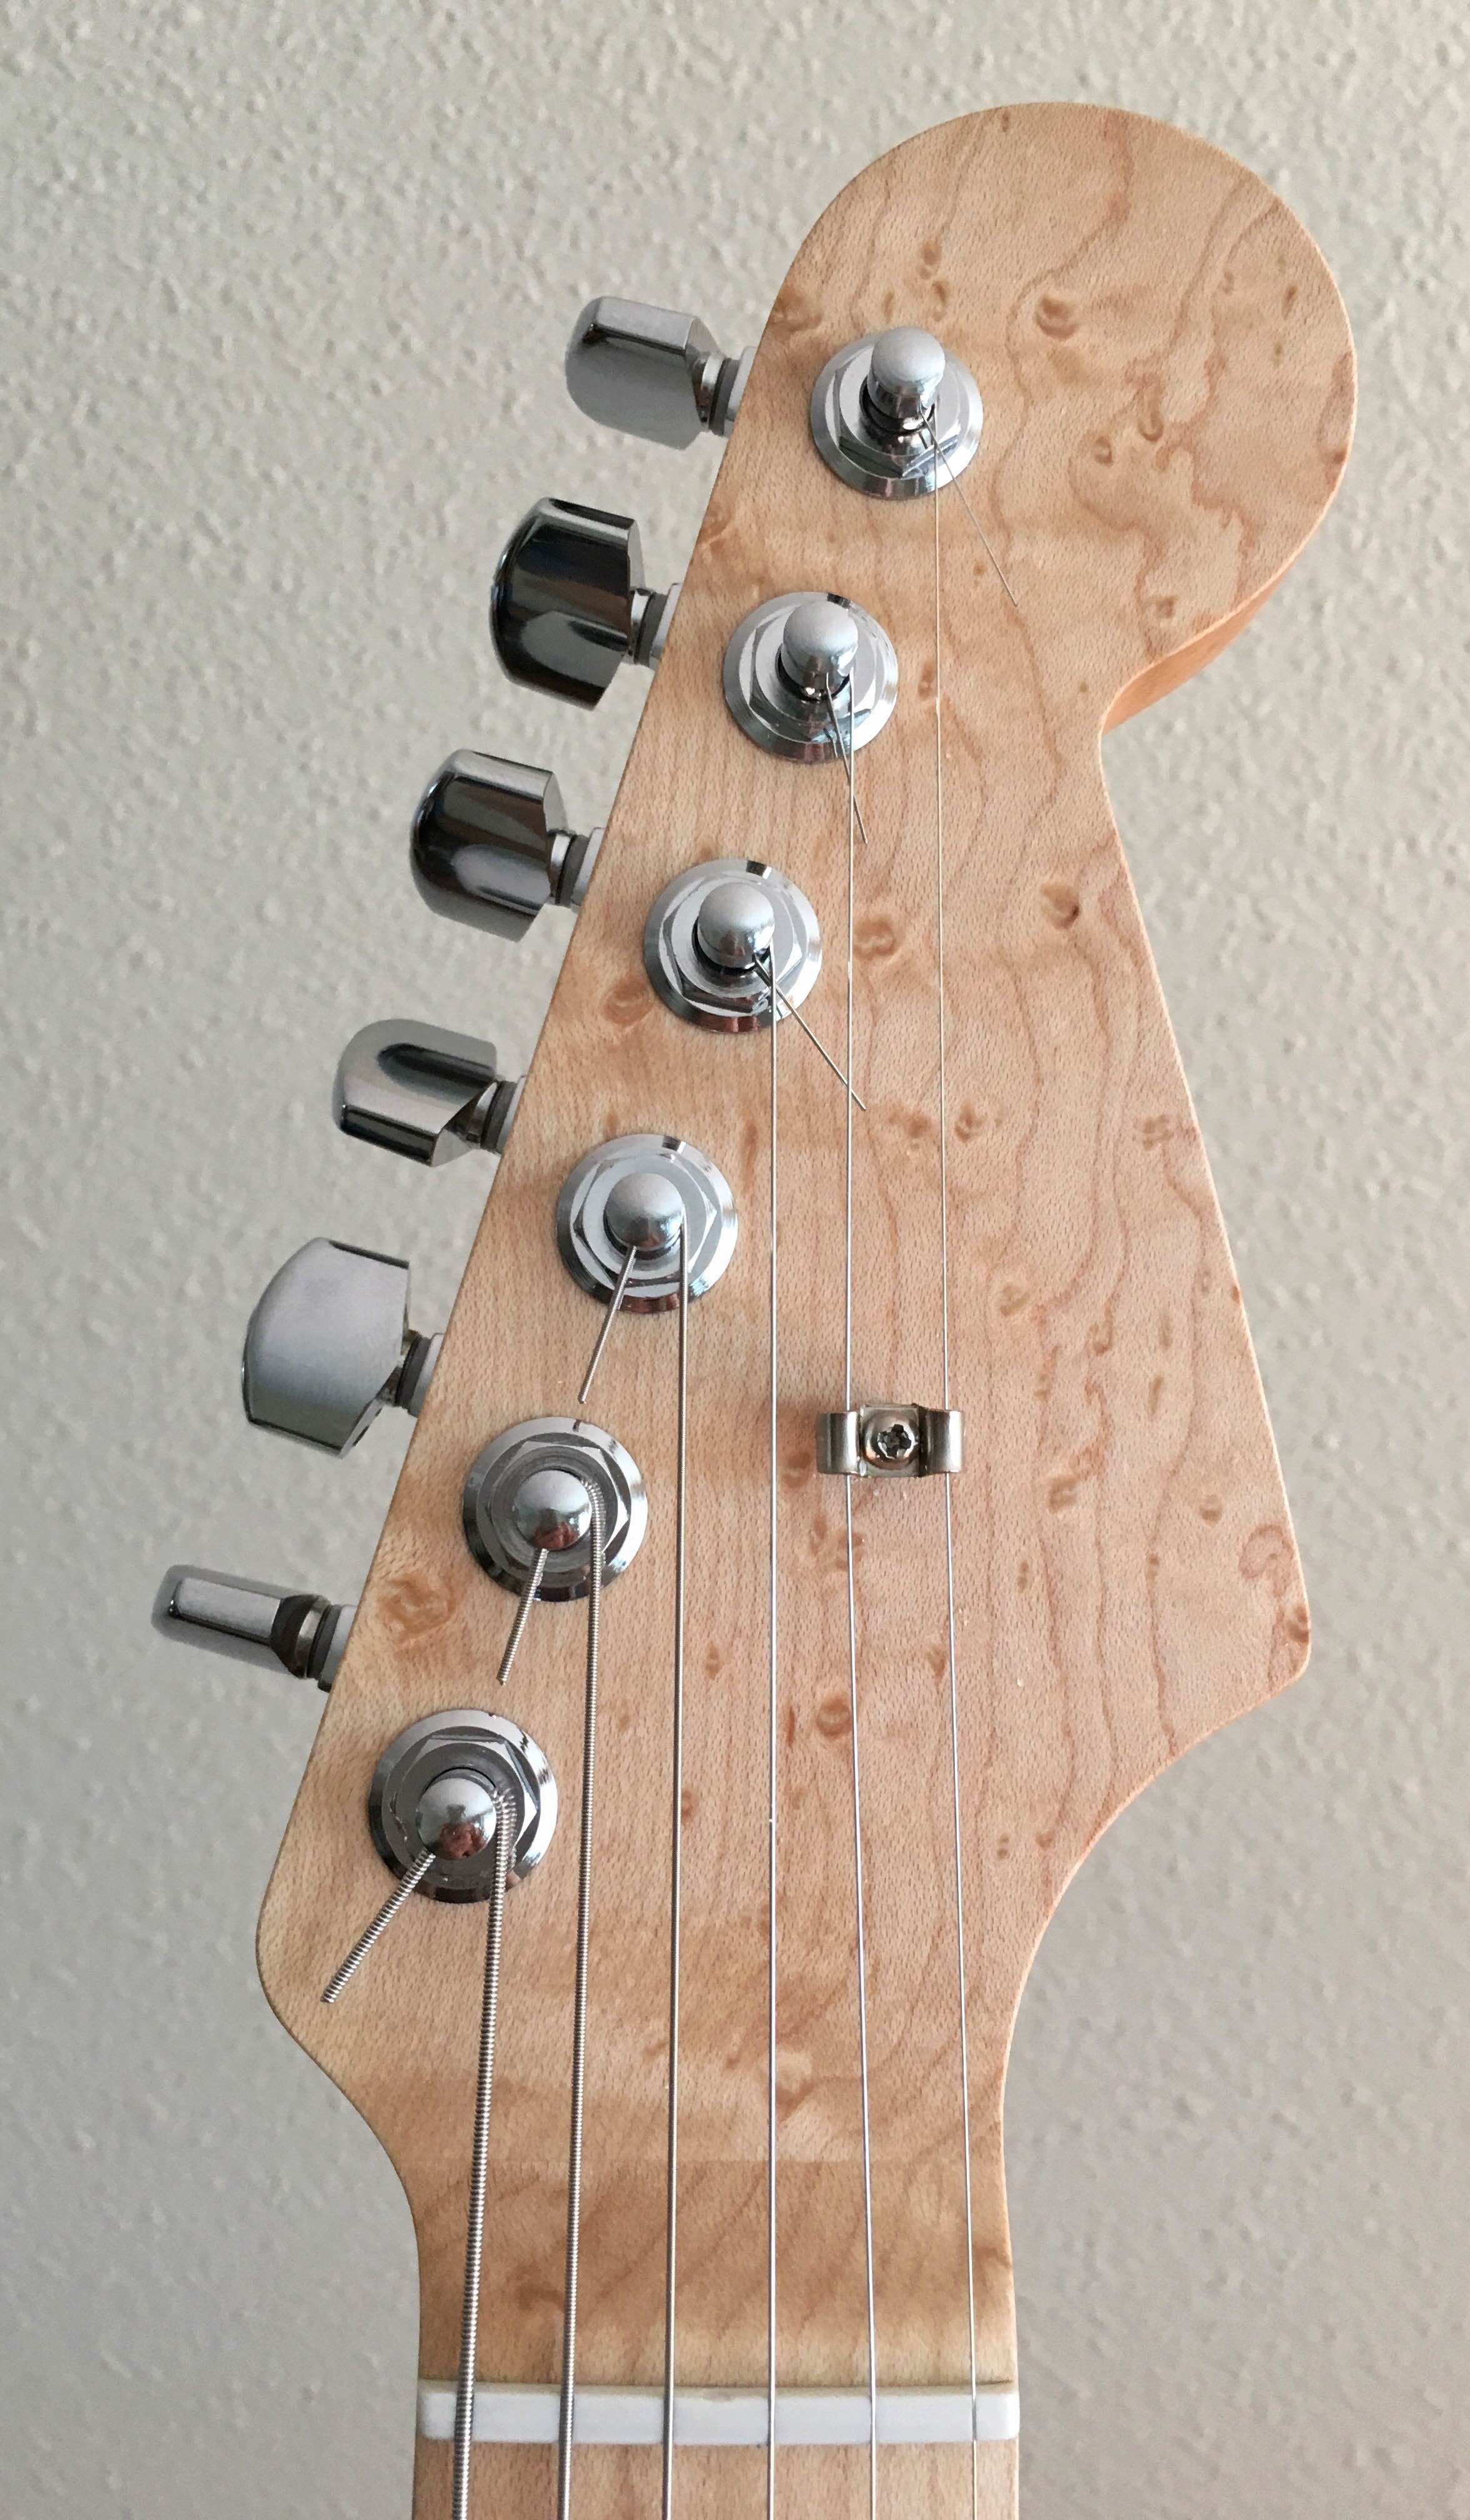
The idea is that the tuners for the high G, B, and E strings are shorter in length, to increase the string’s angle of “break” over the nut. Since the tuner for the high E string is further from the nut than, say, the tuner for the low E string, the angle with which it leaves the nut for the tuner will more shallow. Shallower angles can be responsible for strange string sounds which are tough to eliminate. Many times “string guides” (or “string trees”) are used, little caps which force a deeper angle where the high strings break over the nut. I prefer not to use them if possible – I think the guitar looks a little more cluttered – but it is not always possible to avoid them. Here is a shot of a string tree on guitar #4, where it was needed to keep the B string from making a sitar-like sound.
See below for the difference in height on the front and rear tuning machines, after drilling and installing. The difference is only about a millimeter so you’ll need to look carefully..


Next in the process, the old neck is removed and the new neck is bolted on and then strung to pitch. I am using bigger strings on this neck, 10-46 instead of 8-38.


In this case, I needed to add relief – the slight bowing I left in the neck when combined with the pull of the strings did not cause the ebony neck to flex enough. To add relief, the strings must be relaxed and then the Gotoh side adjuster is cranked counter-clockwise to increase neck relief.

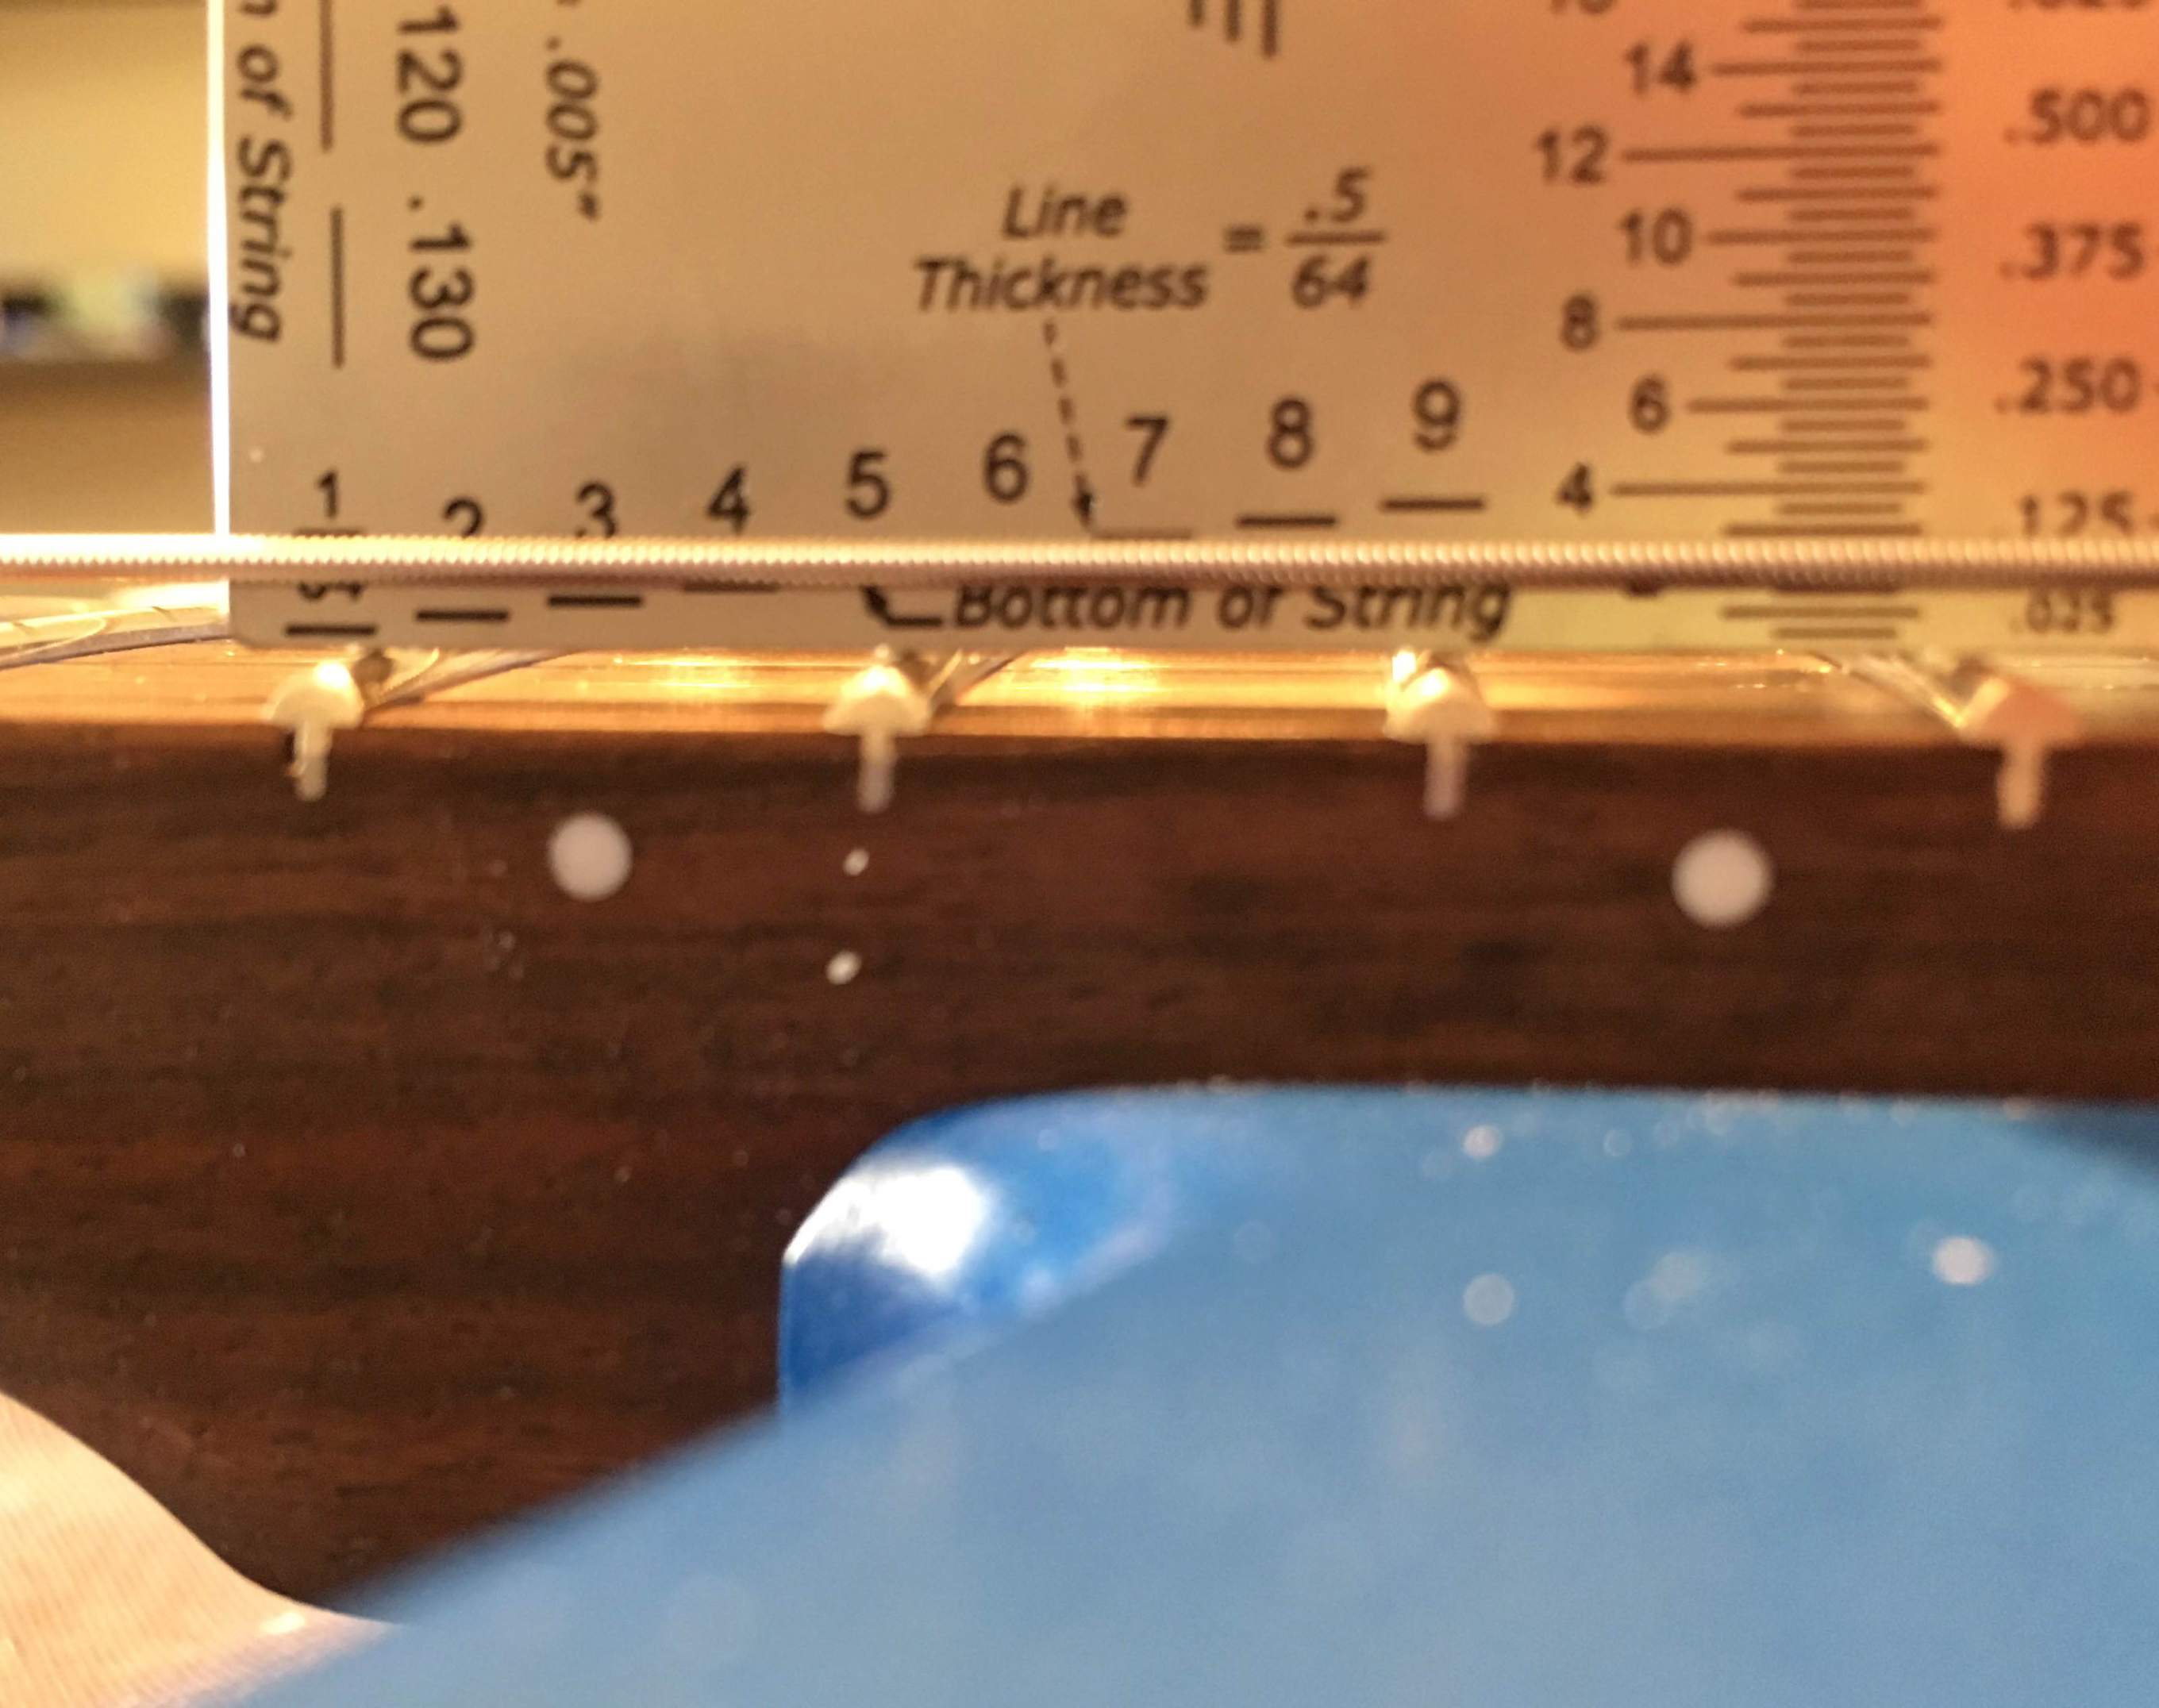
And this is what 0.009 inches of relief looks like 🙂

Next the action, or string height, needs to be set. To do this, tune to pitch. Then I measure the distance between bottom of the high and low E strings and top of the 17th fret. To change the height of these strings, one adjusts the bridge saddles to the desired height (I am using 4/64 of an inch) then re-tune.
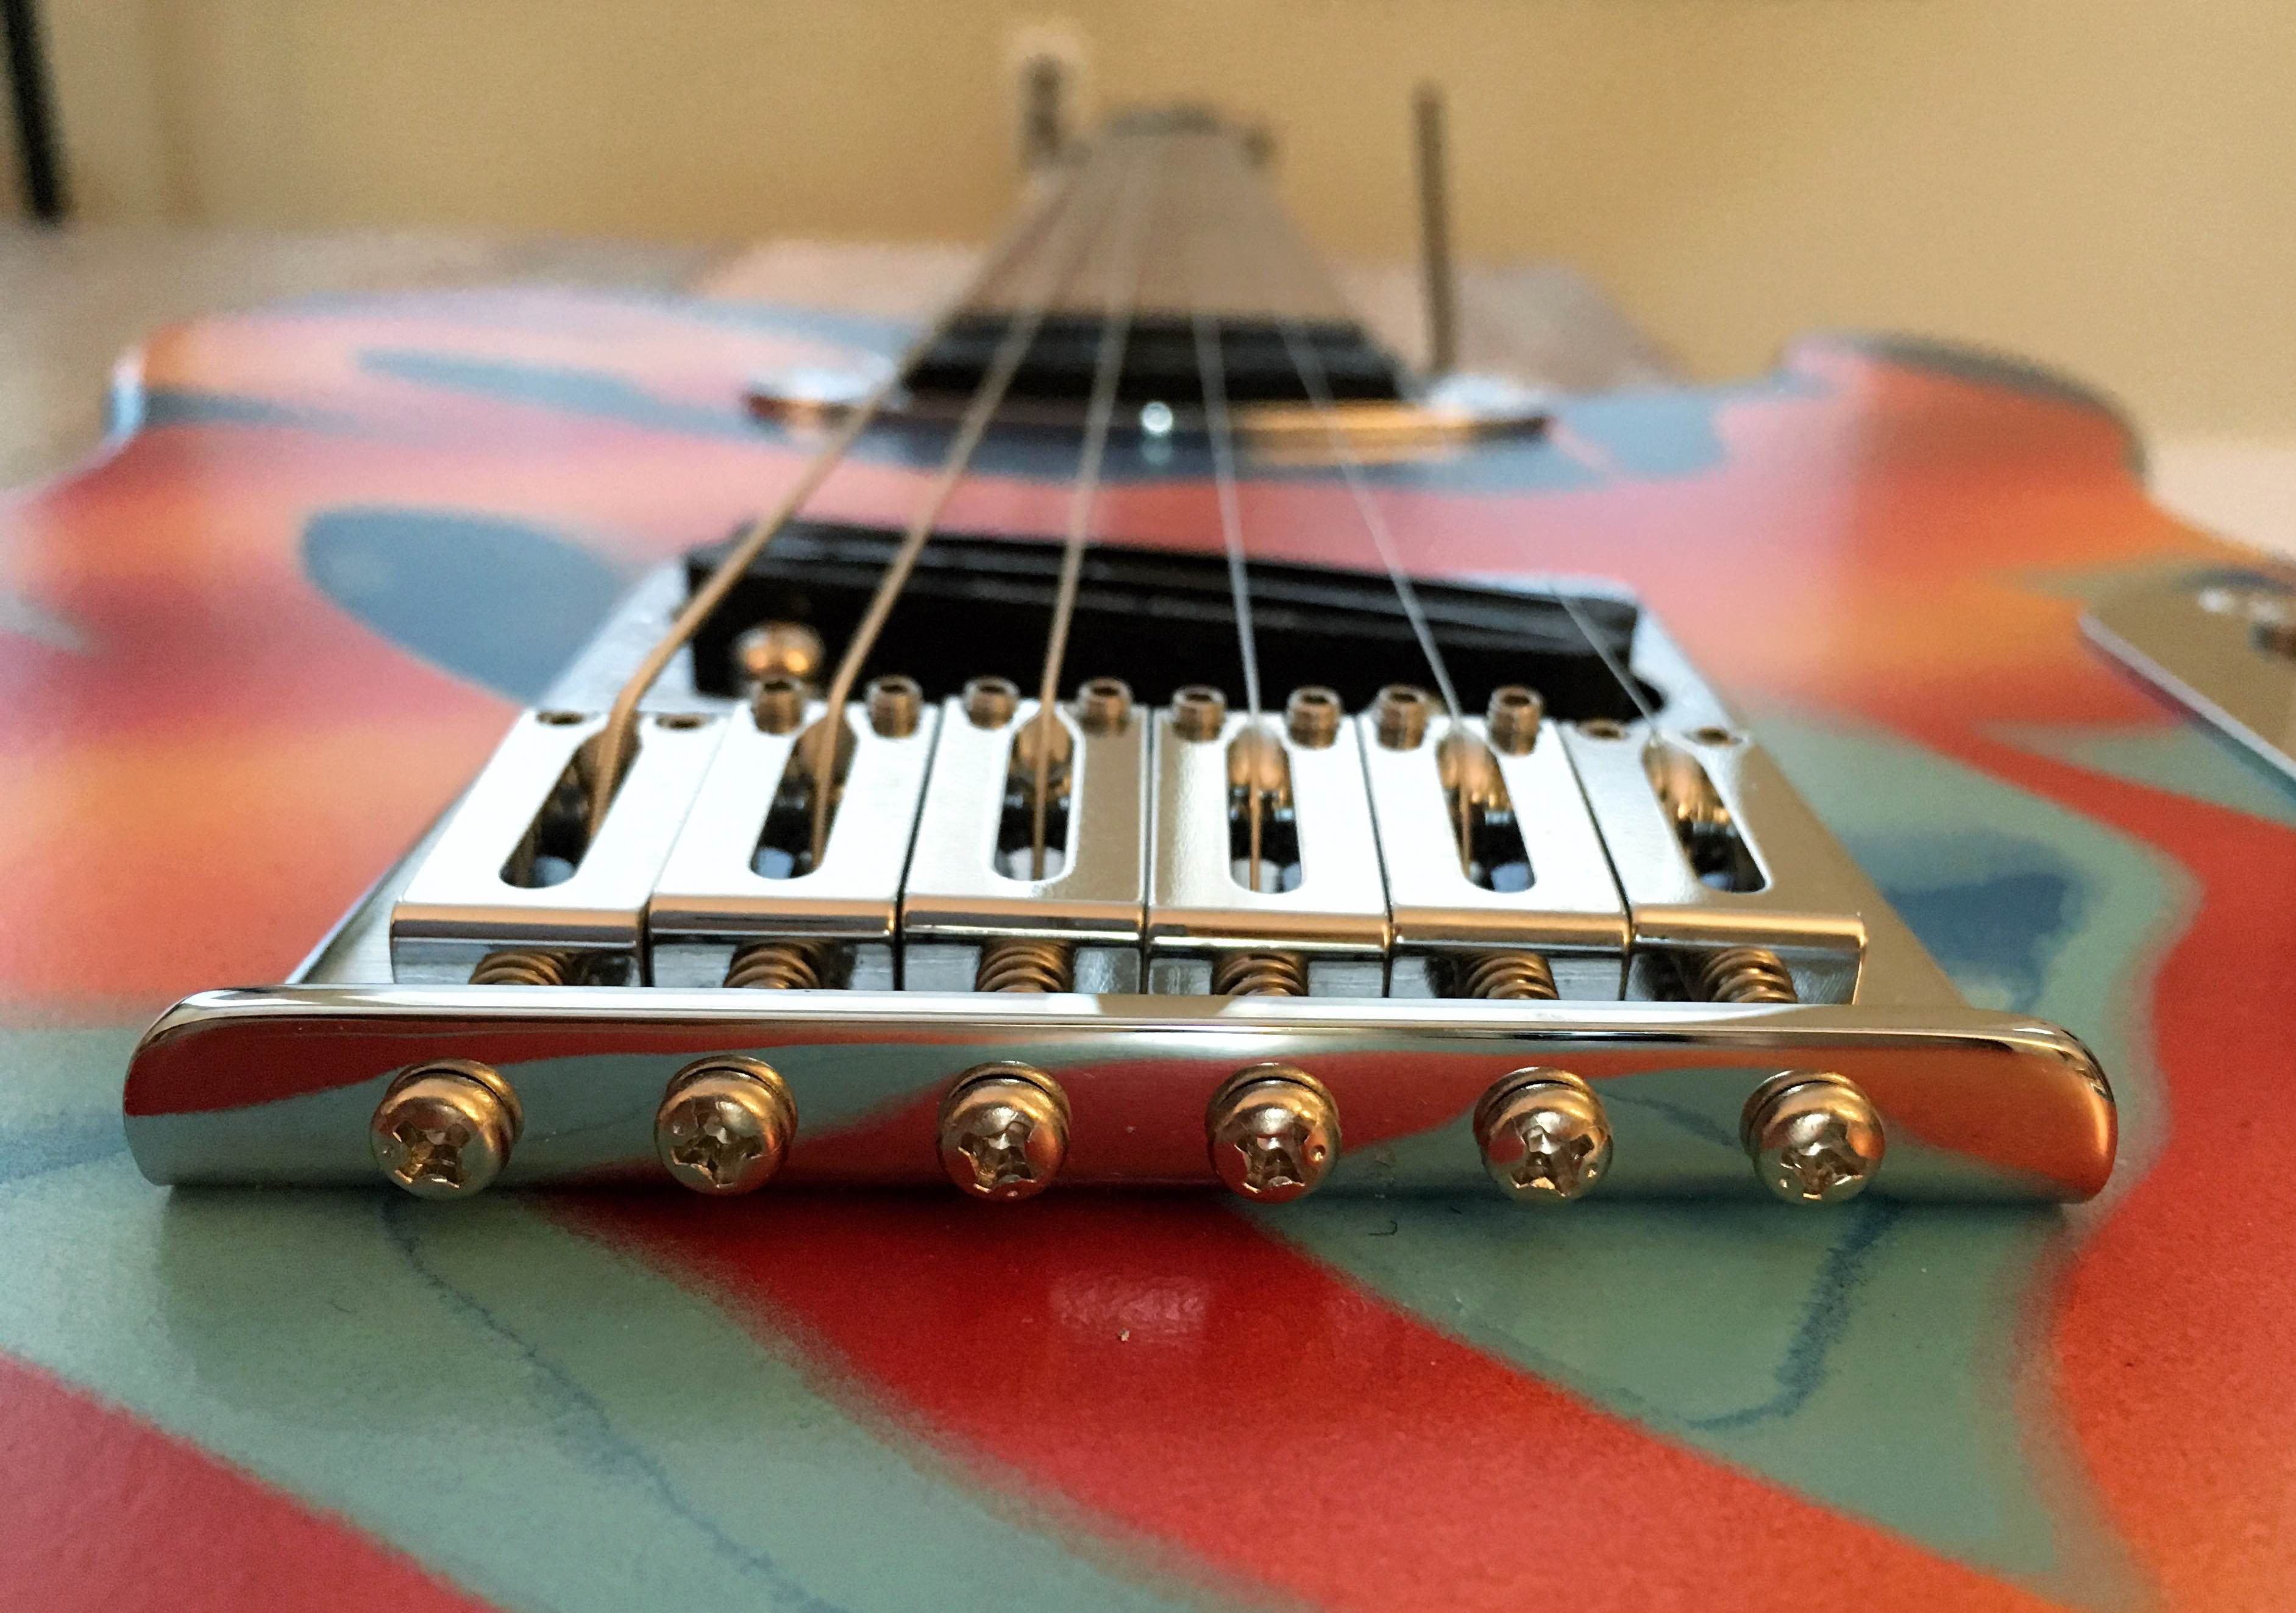
Having adjusted these two outside strings, the remaining string heights are adjusted using a metal arc template which is cut for a specific neck radius. Since this neck is a compound radius 10-16 inch neck, I used the 16 inch template.

After changing the string height, the guitar is out of tune so again, it must be tuned to pitch. Then the pickup height is set. I set the pickup height on this guitar by measuring the distance from the bottom of the first and sixth strings to the top of the pole piece on the bridge pickup. I used a slight gradation wherein the high E string was 4/64 inches away from the pole of the bridge pickup and the low E string was 5/64 of an inch away on the bridge pickup.
Almost done. All that remains is to set the intonation. “Intonation” is the accuracy of the pitch on a given string as one plays up and down the fretboard. In other words, though the string may be tuned to play A when plucked, does it play an E when the 7th fret is depressed and the string plucked? The way to adjust this is to vary the string length in very small increments, using the screws on the end of the bridge saddles.
Now, since the strings have been stretched or relaxed a little, one final tuning is needed and voila! The guitar is done. Here is a shot of the new guitar neck alongside the next book I plan to read.

Update: 03/28/2021
I was playing this guitar earlier in the week, this third guitar I ever made, and I realized just how horrible it sounded when plugged in. It was muffled, muddy, and boomy. So I decided to see what could be done about that. I took out the old electronics and discovered to my surprise that I had used 250K pots for volume and tone, which are not optimal for use with humbuckers. I also decided, having had luck with the bass cut circuit on the Tonecaster project that I would add a treble and a bass circuit to the guitar. So I drew up a schematic:
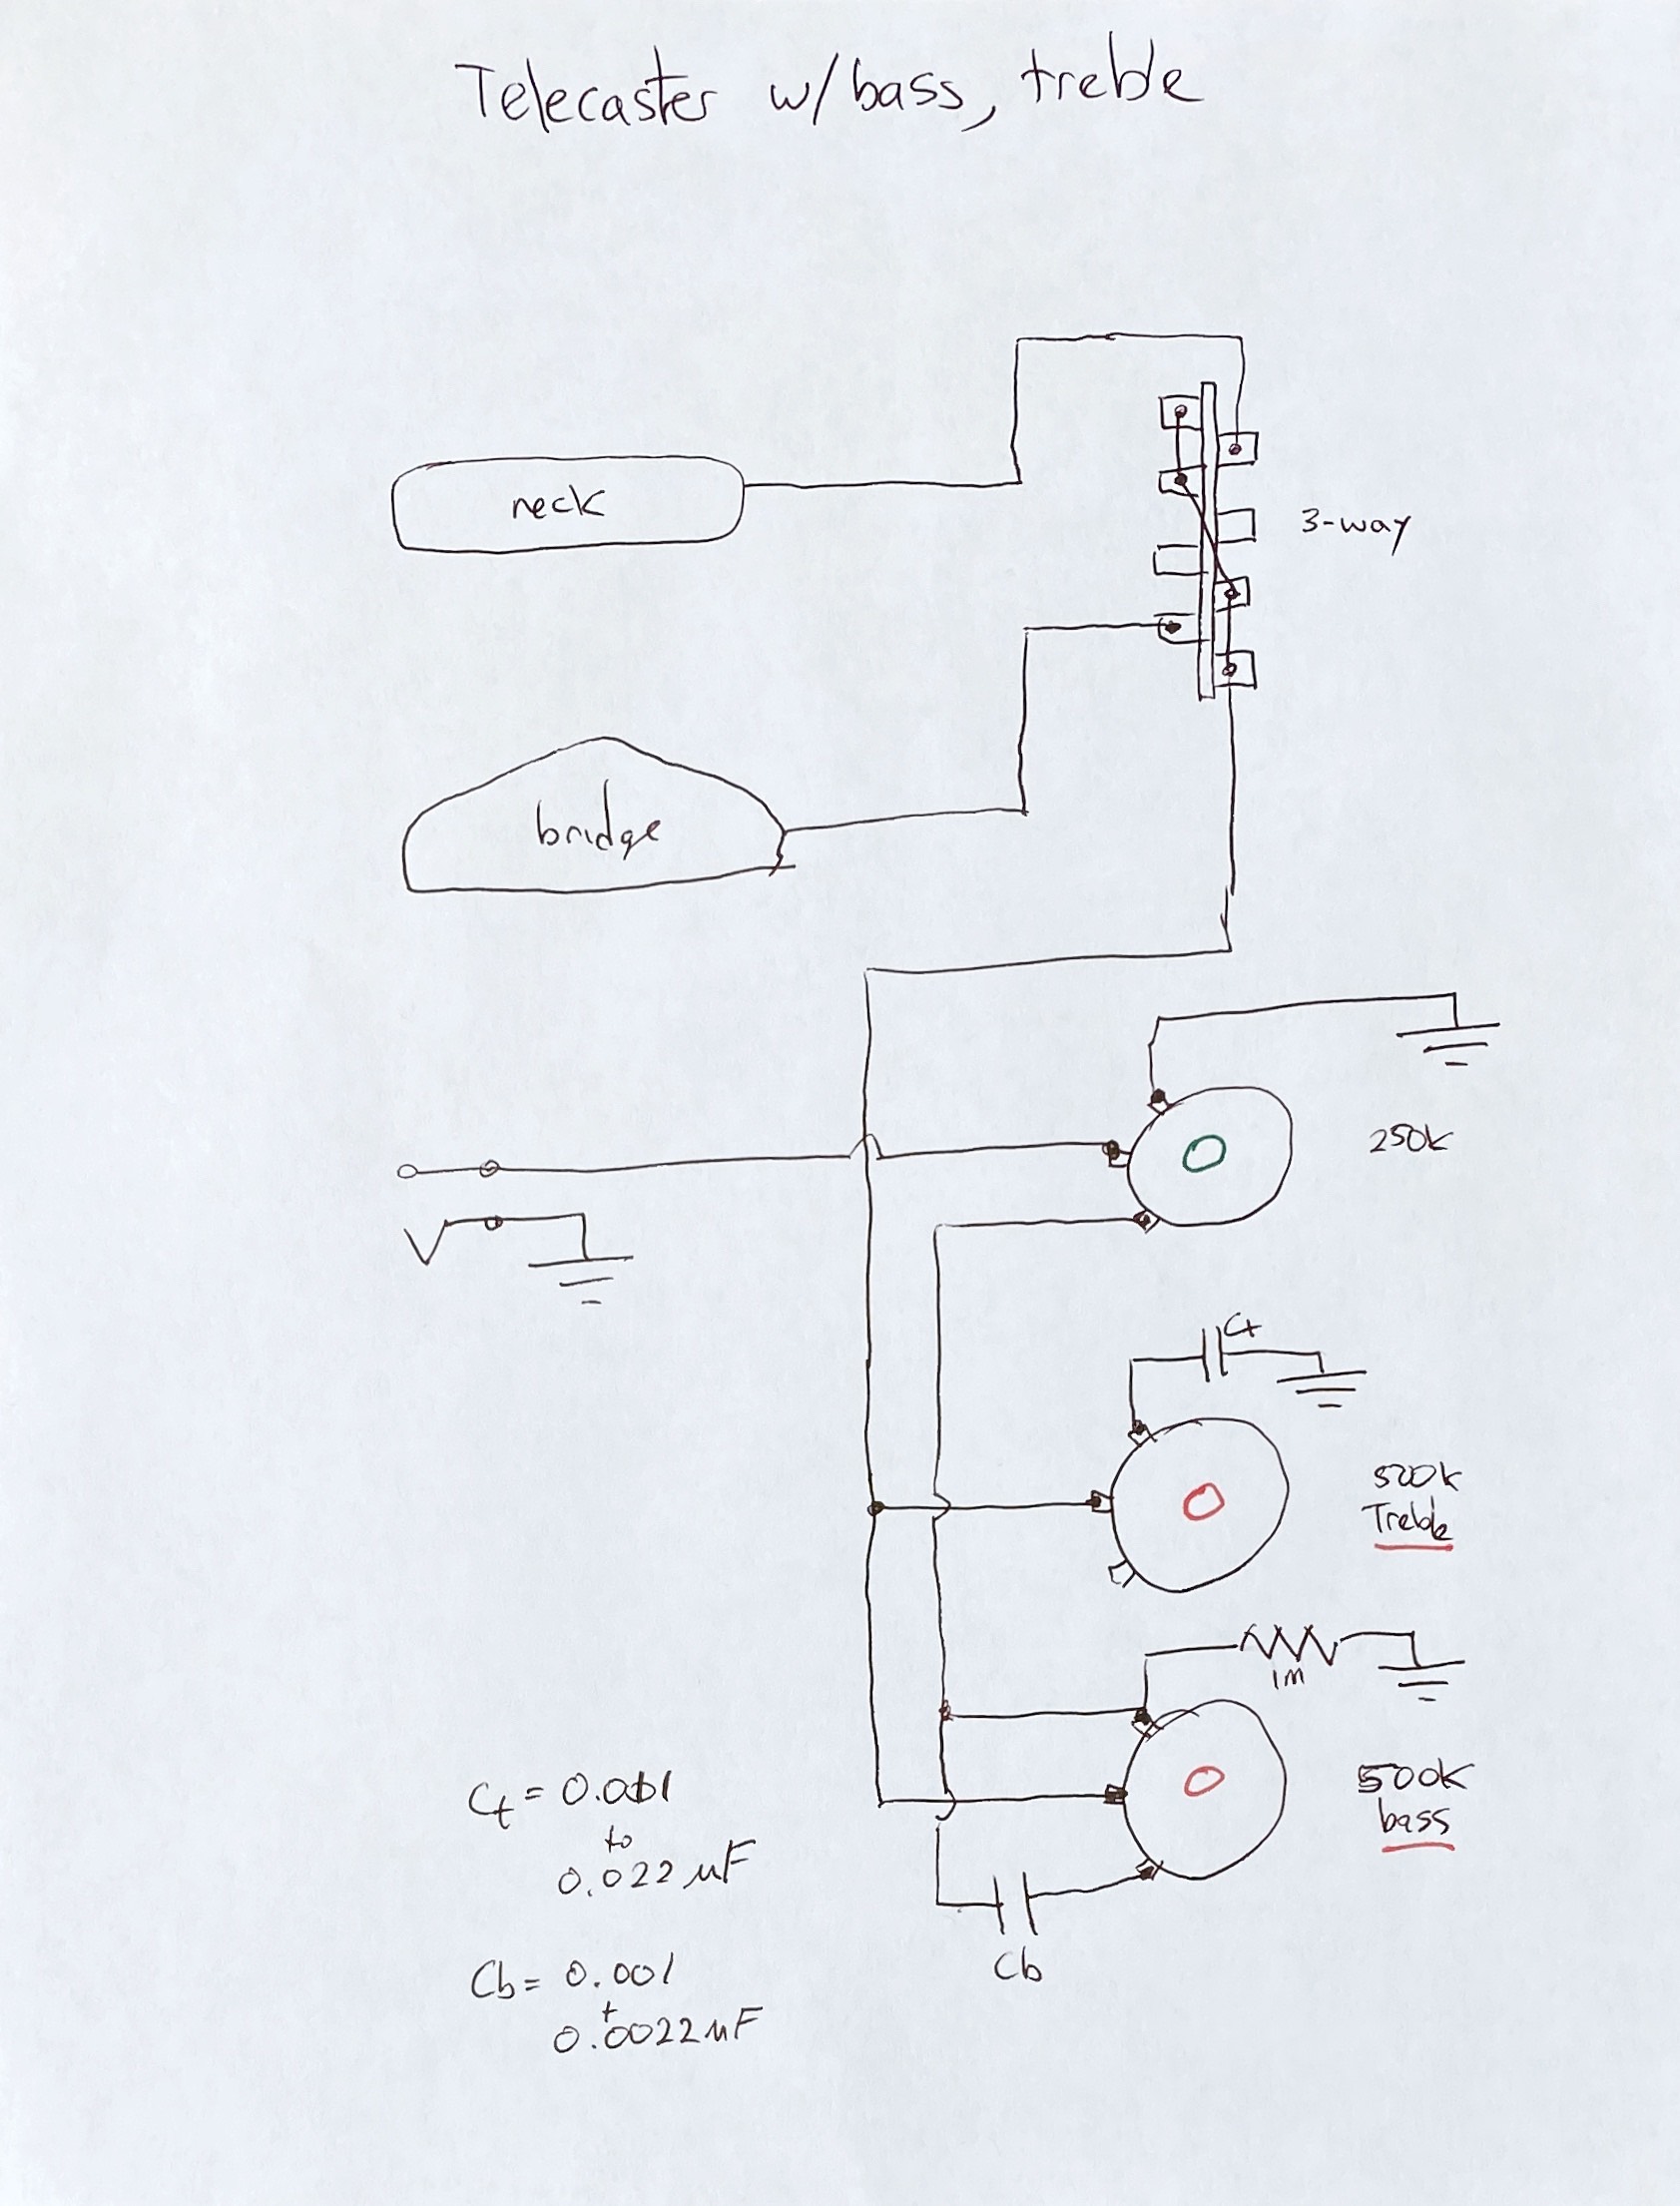
I also managed to find a stacked 500K pot set which allowed me to use one of the knob holes for both controls.

In this new setup, all pots are 500K pots, volume and tone. Eventual Ct is 0.022 uF (22 nF) and Cb is 0.0012 uF (1.2 nF). The reason you see three capacitors is that I needed to build a 0.022 uF capacitor, not having any handy.

And then re-installed in the guitar.

The final thing I changed was to re-setup the guitar with new strings, this time using 9-42s instead of the 10s that were on the guitar.
The effects of this new setup and electronics combo were dramatic. With no bass or treble cut, the guitar sounded much, much clearer. And with both a treble cut and a bass cut, a wide variety of tones are now available, the dual controls acting as an adjustable bandpass filter. Very satisfying 🙂
Ciao.
Categories: guitar #3
Tags: Bass cut, ebony, gotoh, high pass filter, humbucker, neck relief, string tree
3 replies ›
Trackbacks
- Fingerstyle part II – guitarhacking
- Fingerstyle! – Guitarhacking
- On pickups and tone controls – Guitarhacking
